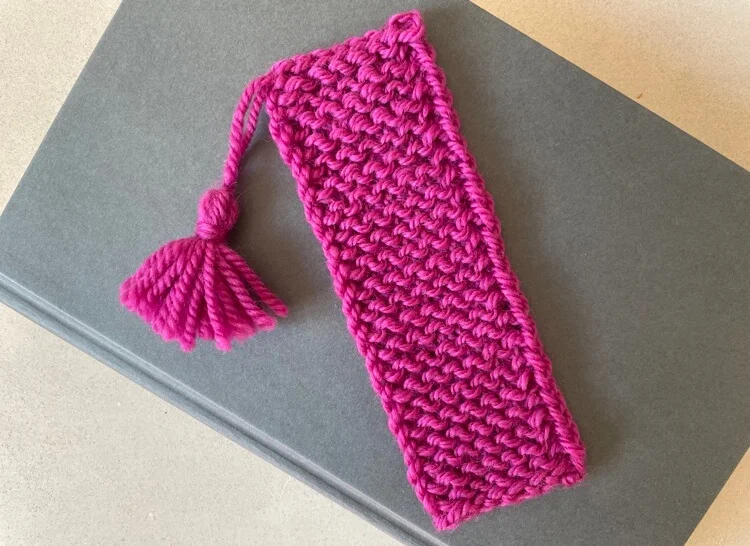
Knitted Simple Bookmark (free pattern)
Discover the charm of the Knitted Simple Bookmark, a delightful accessory that adds a touch of elegance to your reading experience. Crafted with love and care, this bookmark is a testament to the artistry of knitting. The intricate patterns and soft texture of the knitted fabric make it a joy to hold and use. This handcrafted marvel is a true labor of love, meticulously knitted to perfection. Its simplicity is its beauty, as the delicate stitches create a mesmerizing pattern that will captivate your attention every time you open your book. Whether you're diving into a thrilling novel or studying for an exam, this bookmark will keep your place with grace and style. Let the Knitted Simple Bookmark be your literary companion, adding a touch of warmth and charm to your reading adventures.

Materials
- A small amount of yarn. Worsted weight / aran or DK is easiest for beginners.
I used Sirdar Snuggly Crofter baby fair isle effect DK in shade 203 Maisie for my multicoloured bookmark and Rico essentials soft merino aran for my plain magenta bookmark (shade no longer available) – see pic below. - Knitting needles – 5mm (size 8 US) for worsted weight / aran or 4mm (size 6 US) for DK yarn, or needle size recommended on your yarn. Needle size is not vital here.
- A blunt tapestry needle for weaving in ends
- A scissors
- A small piece of card for making tassel (optional)
- A few pins for blocking your bookmark to dry (optional)
Easy Garter Stitch Bookmark Knitting Pattern
Cast on 8-10 stitches
Any cast on method will work here.
Cast on 8 stitches with 5mm needles (size 8 US) if using worsted weight or aran yarn.
Cast on 10 stitches with 4mm needles (size 6 US) if using DK yarn, which is a bit finer.
Use the recommended needle size on your yarn ball. The above is just a general guide. If you have slightly different size needles, that’s fine too. It won’t really matter for this project.
Knit every stitch in the first row
Use the basic knit stitch, also known as garter stitch, to knit every stitch. Turn your work.
Keep knitting until your strip measures 6 inches approx
You can knit a shorter or longer bookmark if you prefer.
Optional: if you would like neater edges, you can slip the first stitch in each row. To do this, bring your yarn end to the front before you start the row. Now put your right needle into the first stitch from right to left, to move it across to your right needle without twisting it. This is called slipping a stitch purlwise. Then bring your yarn to the back and knit the rest of the row as usual.
Cast off all stitches
Cut your yarn, leaving a tail for weaving in. You can just pull the loose end to secure the last stitch and that’s neater than knotting it through.
Weave in the top and bottom yarn ends
Take a blunt tapestry needle and weave in the cast on and cast off ends into your knitted bookmark piece to secure and hide them. Congratulations: you have just hand knit a bookmark! If you want to take it to the next level, complete the finishing touches steps below.
Add a tassel (optional)
You can bling up your basic knitted bookmark by adding a tassel. This looks fancy but is very easy to do and only takes about 5 minutes.
Once you’ve made your tassel, take the 2 loose ends from the knot on the top and attach them to the top left corner of your bookmark. Thread each end with your needle, and weaving them in and out a bit to secure them. I left around a 2 inch length between the top of the bookmark and the top of the tassel, but you can have any tassel cord length you like.
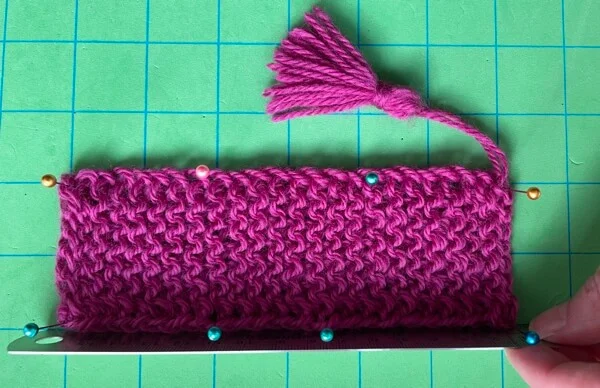
Wash & dry your bookmark (optional)
You can use your bookmark as is, but you can neaten it up by washing and drying it first. This is known as blocking and it gives your projects a professional finish.
Leave your bookmark to soak in a small bowl of water for a while (at least 20 minutes). Then take it out and carefully squeeze out the excess water. Don’t wring it, just press it in your hands or a towel.
Then lay your bookmark to dry on a towel, or a piece of foam etc. Anything you can leave something damp on will do. Take a couple of minutes to shape the bookmark and tassel as you want it. Focus on straightening the edges and evening out the stitches. If it isn’t staying put, you can put pins at the corners or any troublesome spots. This is good practice for blocking more complex and larger projects in the future.
Leave your bookmark until it is fully dry. This could take 24 hours or even longer. But you will be amazed at how big a difference blocking makes, even to a simple beginner bookmark.
Once you know how to cast on, do the knit stitch and cast off, you can knit this easy bookmark. It won’t take long and I hope you enjoy making it.