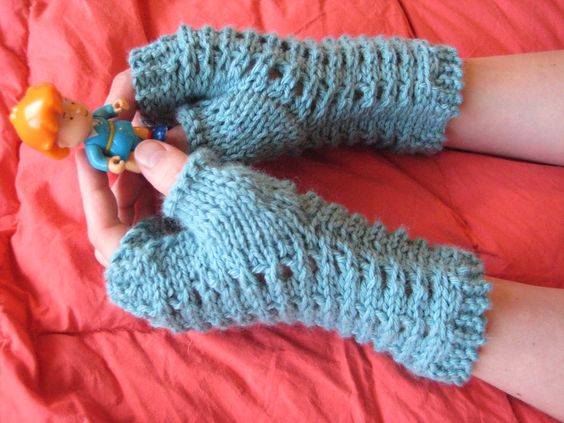
Slip-Stitch Mesh Fingerless Gloves
The Slip-Stitch Mesh Fingerless Gloves are a versatile and stylish accessory, providing warmth and comfort while still allowing for full finger mobility. Made with a breathable mesh design, these gloves are perfect for various activities, including outdoor work, cycling, or even casual wear. The fingerless feature ensures easy access to touch screens or other tasks requiring fine motor skills.
Sizes: smaller (for a hand roughly 7 1/2" - 8" in circumference at the base of the thumb) and larger (for a hand roughly 8 1/2" - 9" in circumference at the base of the thumb) - directions for larger size will follow those for the smaller size in parentheses
Yarn: Berroco Vintage (52% Acrylic, 40% Wool, 8% Nylon; 218 yards [200 meters]/100 grams); #5120 Gingham - one skein
Needles: One set of straight needles in size US 8 (optional: another set of straight needles in size US 7)
Notions: Tapestry needle
Gauge: 18 stitches = 4 inches
So, as I mentioned, we'll begin with the thumb. And, if desired, here's your chance to use a smaller gauge needle, if you want the thumb to fit a little more tightly. Either way, the thumb will look better if you knit on the tighter side of things through the short rows. Anyway, cast on 14 stitches (16 for the larger size) loosely, and then purl one row across. And then we'll work the following (notice that you will be working short rows from row 4 - 12)
So let's get started by casting on 34 stitches loosely and then proceeding as follows:
Row 1 (right side): knit
Row 2: k3, purl until there are three stitches left in the row, k3
Row 3: k5, * slip 1 with yarn in back, k1; rep from * until there are three stitches left in row, end k3
Row 4: k3, * k1, slip 1 with yarn in front * until there are five stitches left in row, end k5
Row 5: k4, * yo, k2tog * until there are four stitches left in row, end k4
Row 6: same as row 2
Knit rows 1 - 6 eight times (nine times for the larger size), knit row 1 one final time, and bind off loosely. And now, it's time to assemble this bad boy, which we'll do by first seaming the glove part, and then adding the thumb. To begin, then, pick up the rectangle you just knit and match your cast-on edge with your cast-off edge. Determine where, exactly, you want the thumb of your mitt to be positioned, and then seam the top and bottom of the glove as appropriate, leaving a hole where you'll stitch in the thumb (I suggest planning to put the top seam of the thumb a little over 2" below the top of your glove, but since this isn't knit in the round, you can do whatever you please). If you need any tips on seaming, I recommend Vogue's Beyond the Basics page. Then, once you're done with these seams, stitch in the thumb and tuck in ends. And finally, make another!