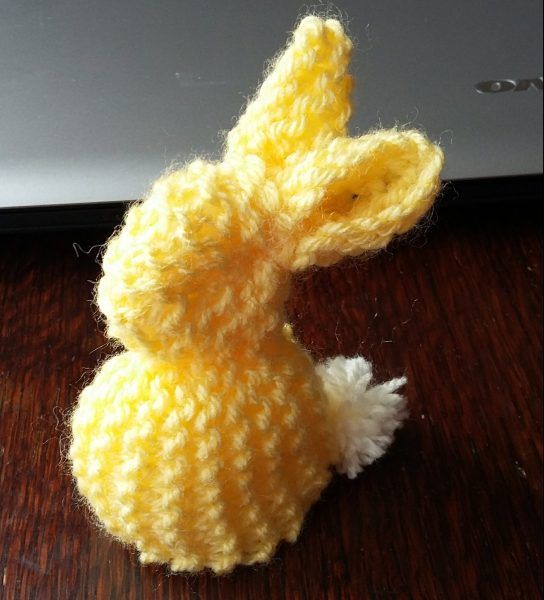
Knitted Easter Bunny
This adorable bunny was carefully hand-knitted with love and attention to detail. Its soft, fluffy texture and intricate design make it a perfect addition to any Easter decor or as a thoughtful gift for a loved one. The craftsmanship that went into creating this knitted Easter Bunny is evident in its charming appearance and high-quality materials. Whether displayed on a mantel or given as a present, this sweet bunny is sure to bring joy and a touch of whimsy to the Easter season. The artistry and skill required to knit this bunny showcase the talent and dedication of the creator.
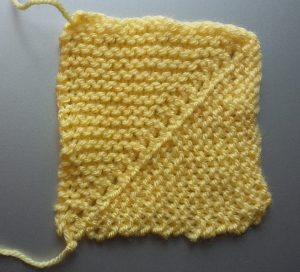
To make the Bunny you will need to knit a square in garter stitch (every row knit) of approximately 4½ inches square (as tall as it is wide) which will be the size to fit a small chocolate egg.
This can be a larger or smaller square to produce different sizes of Bunny. I have kept experimenting with various numbers of stitches to produce various sizes of squares and have now decided upon the number of stitches required to make your Bunny fit a small chocolate egg.
To make your square take 4 mm knitting needles and cast on 24 stitches. Knit every row in knit stitch (garter stitch) until your work measures the same in length as in width and cast off. This should make a square approximately 4½ inches tall and wide. (I knitted 38 rows to produce the square. Your square might take more or less rows.)
I found a mitred square which I had knitted previously as I couldn’t wait until I had knitted a new square and used this for the Bunny. I believe I used 5 mm (UK) knitting needles and Double Knitting yarn and cast on 36 stitches. This produces the fairly loose knitted square shown below. Each side had 18 stitches.
Making your square into an Easter Bunny:
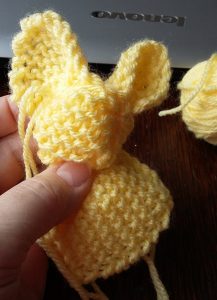
Take a strand of yarn, the same colour of your knitted square and sew a running thread (best described as in and out, in and out) from side to side half way down the square and sew another thread from half way down the side to the centre top and down to the other side (in the position shown by the purple yarn in the photo below)
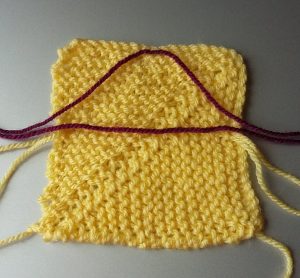
Pull on the sides of the top draw string thread and secure with a double knot, which will form the shapes of ears. You may need to add a stitch or two to the bottom of the ears when sewing in the loose threads, to create the perfect shape.
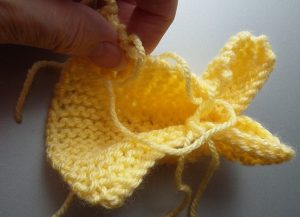
I like the open part of the ears to be at the front of the rabbit and you will see that the nose shape now appears to be at the back as in the picture above. Push through a nose shape from the back so it sticks out in the same direction as the front of the ears.
Fill the nose with filling of your own choice and pull on the centre draw string slightly to form a head and tie in a knot to secure. Sew in all the loose draw string ends.
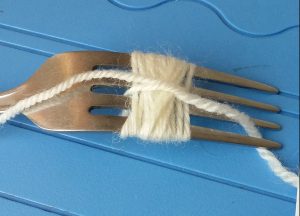
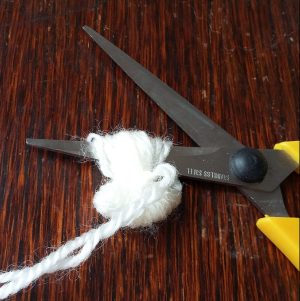
To make a tiny pom pom for a tail, wind yarn around a fork and secure tightly at the front (as shown below) and at the back to secure all the tiny strands of yarn before cutting both sides of the strands to form a pom pom.
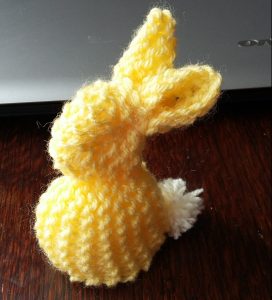
To complete your Easter Bunny sew together the centre back and any opening still left down the back of the head as you need to enclose the filling for the head. Sew on the pom pom tail.
You can fill the body of the Bunny with a small chocolate egg of your choice. If you find the egg falls out, please sew a couple of stitches across the tail end of the opening at the bottom, to reduce the size of the opening slightly, so the egg will be trapped and not fall out too easily.
I haven’s sewn any features on the face of the Bunny but of course you can if you choose.
I hope you enjoy making this as much as I did.