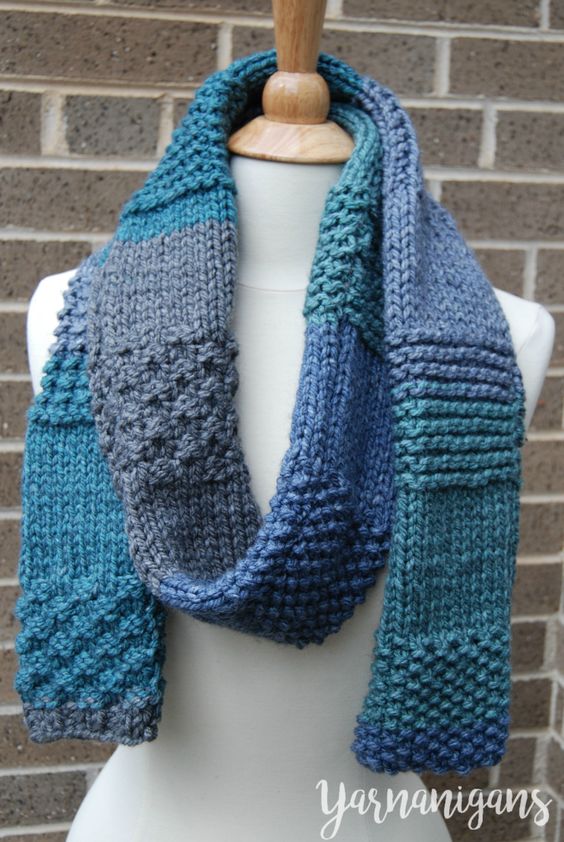
Knitted Sampler Scarf
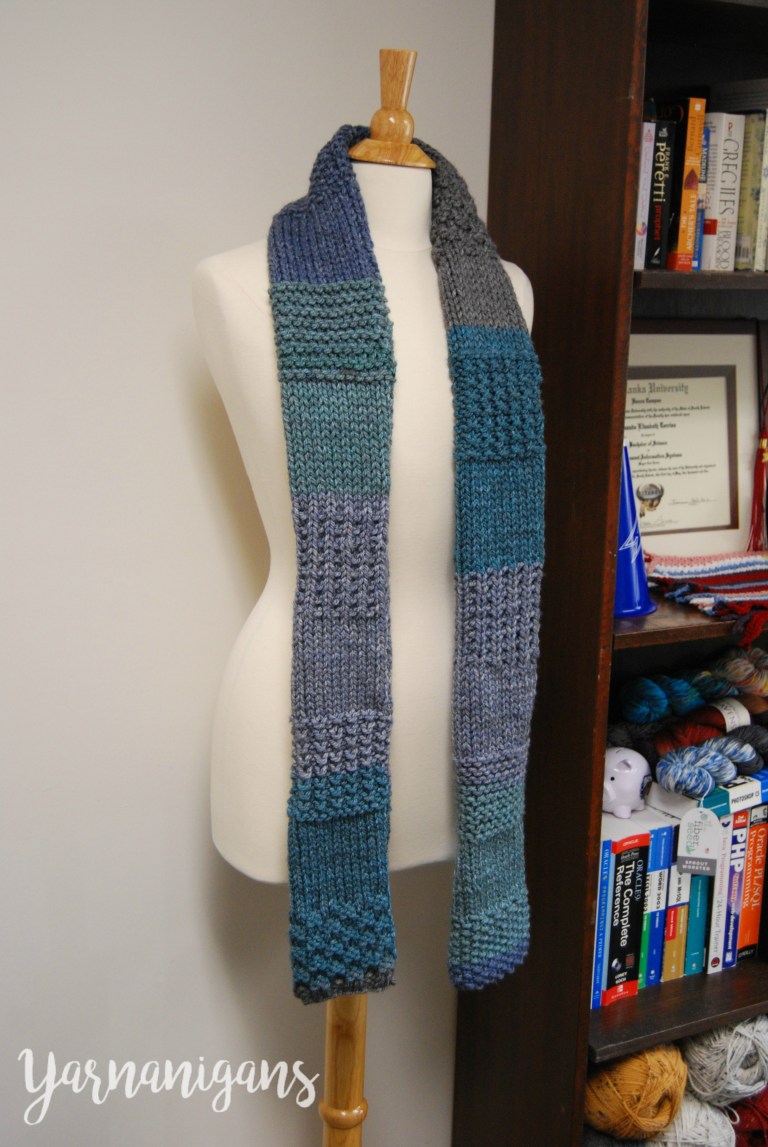
Indulge in the luxurious charm of our meticulously crafted Exquisite Patchwork Scarf. This stunning accessory is a true work of art, combining various knitting techniques to create a mesmerizing patchwork design. Each section of the scarf showcases a different pattern, skillfully knitted together to form a harmonious whole. The intricate details and vibrant colors make this scarf a standout piece that will effortlessly elevate any outfit. The combination of different stitches and patterns creates a visually striking effect, showcasing the versatility of this timeless accessory. Whether you drape it around your neck or wear it as a shawl, the Patchwork Scarf will envelop you in warmth and style. Embrace the beauty of this knitted masterpiece and make a fashion statement that is truly unique.
Skill: Easy
Materials
- US size 11/8 mm straight or cabled needles (I absolutely love my Lykkes*)
- At least 280 yards super bulky (6) weight yarn – I used 2 Caron Tea Cakes in Oolong (available exclusively at Michaels)
- scissors
- tapestry needle
Gauge
10.5 stitches x 14 rows per 4″ square
Abbreviations
- k – knit
- p – purl
- co – cast on
- st – stitch
Stitch Definitions

Moss (or Seed) Stitch: R1 (RS): k1, *p1, k1* repeat from * to * across row. R2 (WS): p1, *k1, p1* repeat from * to * across row. Repeat R1 and R2 for length of swatch.
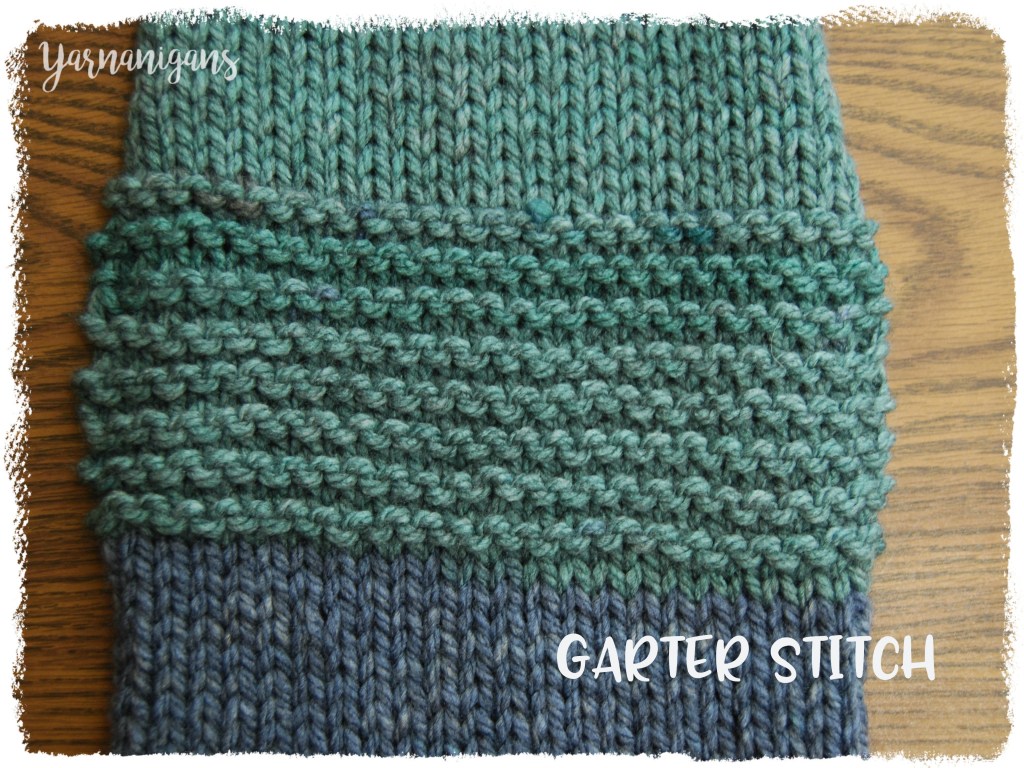
Garter Stitch — R1: k across. Repeat R1 for length of swatch.
Stockinette Stitch (pictured in each the other stitch photos) — R1 (Rs): k across. R2 (WS): p across. Repeat R1 and R2 for length of swatch.
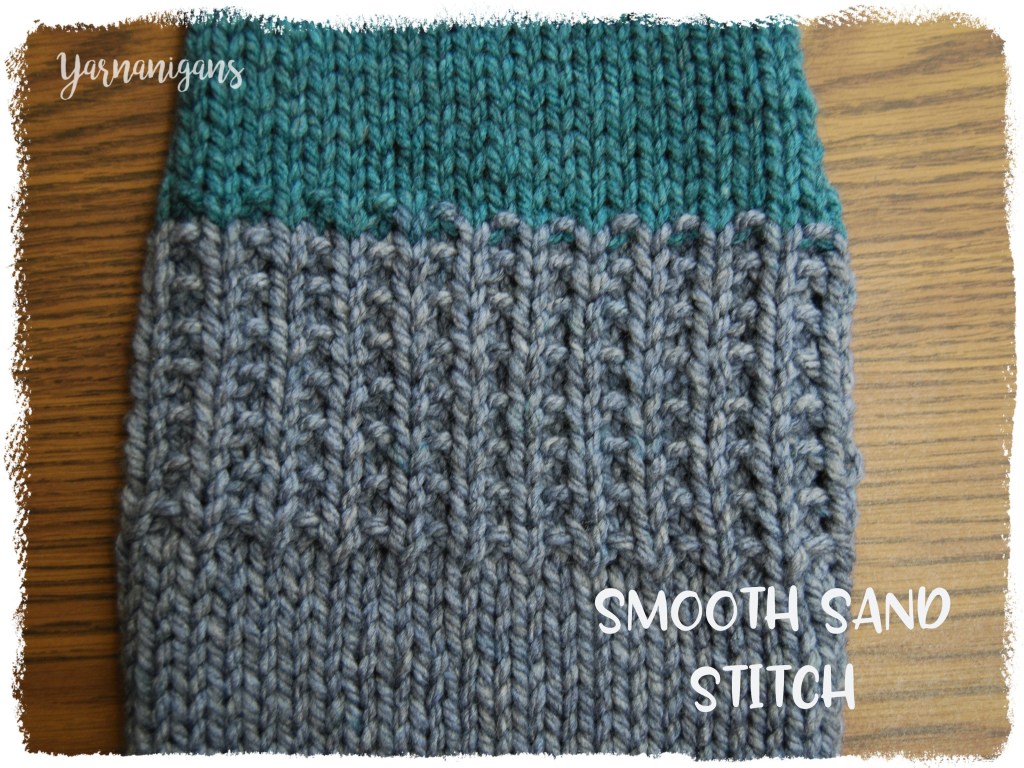
Smooth Sand Stitch — R1 (RS) k across. R2 (WS): k1, *p1, k1* repeat from * to * across row. Rep R1 and R2 for length of swatch.

Nubby Sand Stitch — R1 (WS): k across; R2 (RS) k1, *p1, k1* repeat from * to * across row. Rep R1 and R2 for length of swatch.
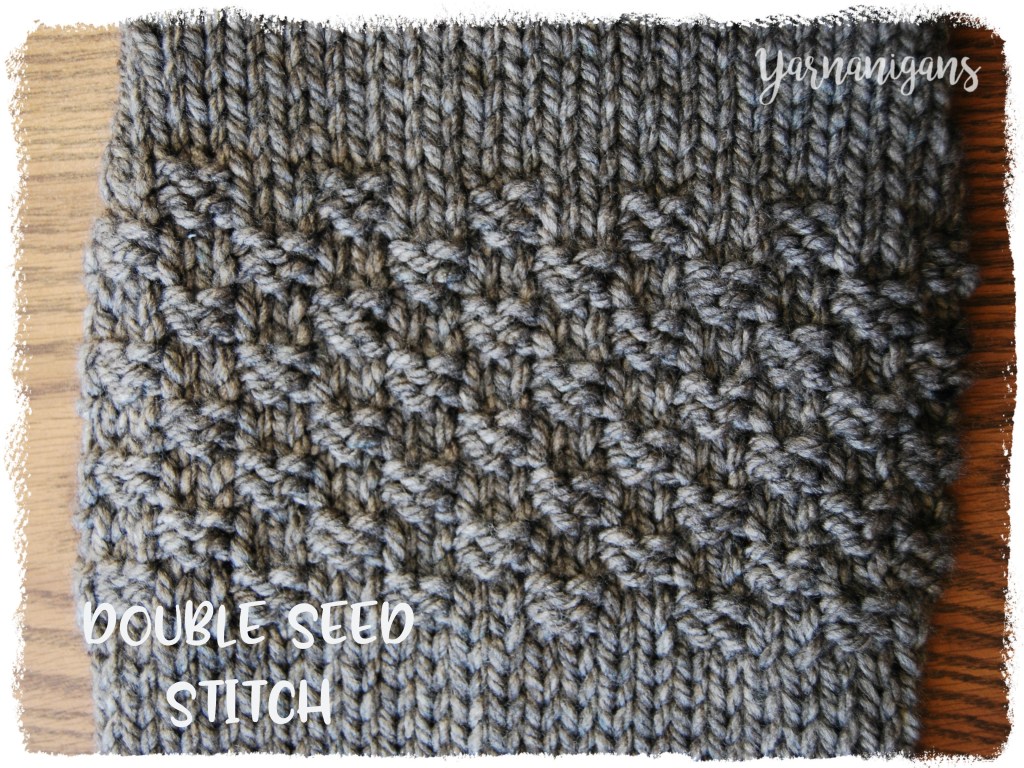
Double Seed Stitch — R1 and R4: k2, *p2, k2* repeat from * to * across row. R2 and R3: p2, *k2, p2* repeat from * to * across row. Repeat R1-R4 for length of swatch.
Pattern Notes
This scarf is made with a combination of the different knit/purl stitch patterns listed in the section above. Each stitch sample is approximately 3.5″ – 4″ in height before switching to the next stitch sample. You can follow the combination I used below or mix them up, eliminate ones you don’t like, or add in others you love. Make it yours!
I’ve mentioned a few times that I’m a fairly new knitter. I never fully realized until after I made this project that stockinette fabric doesn’t have smooth edges and tends to curl. This led me to the design choice to shorten the width of the scarf by sewing the edges of the scarf together to make a long ‘skinny’ tube scarf. I use the phrase skinny lightly though because due to the super bulky weight of the yarn I used, it still has a good amount of width. I feel like my greenness led to a happy outcome with this design choice because the scarf is doubly warm. Also, the beauty of the right side of the knit fabric is seen from all angles while the less attractive wrong side of the fabric is confined inside the tube.
To that point, if you want a wider scarf and/or don’t want to sew up the edges to create a tube scarf, you have the option to cast on additional stitches at the start of the project to create a border in moss stitch, garter stitch, or other even, non-curly stitch to combat the curl of the stockinette stitch. For example, if you cast of an additional 8 stitches in the pattern, you’ll knit your non-curly stitch for the first 4 stitches, then follow the stitch for the pattern swatch for the next 25 stitches, then finish the last 4 stitches in your non-curly stitch.
Another trick I learned post hoc was that you can knit a selvage on your fabric! By casting on an additional 2 stitches on your initial cast on, you can create a straight selvage that is helpful when knitting pieces that will be sewn together. To create the selvage, you will always knit the first stitch and slip the last stitch, making sure to bring the yarn toward you before slipping, so that it will be ready to knit on your return. How cool! Apparently I still have lots and lots to learn about the world of knitting.
Pattern Instructions
- CO 25.
- moss stitch 3.5″
- stockinette stitch 3.5″
- garter stitch 3.5″
- stockinette stitch 3.5″
- smooth sand stitch 3.5″
- stockinette stitch 3.5″
- nubby sand stitch 3.5″
- stockinette stitch 3.5″
- double seed stitch 3.5″
- stockinette stitch 3.5″
- Repeat steps 2 through 10 once.
- Fasten off, leaving a long tail approximately 3 feet.
- Fold scarf in half longways, WS facing. Using a tapestry needle and long tail, sew edges together using a whip stitch or mattress stitch to create a tube. Secure ends and weave in.