Knitted Spring Scarf
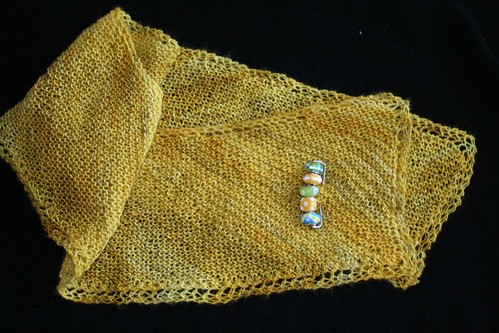
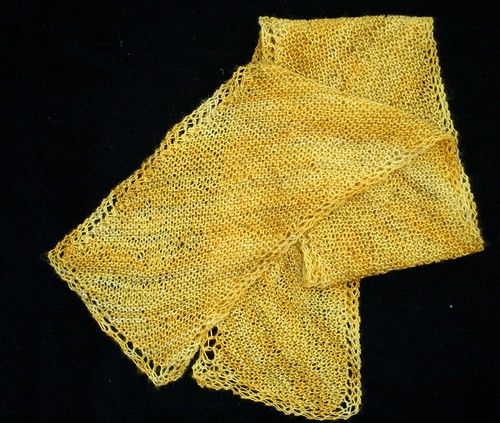
Introducing the Spring Blossom Scarf, a beautifully crafted accessory that will add a touch of elegance and warmth to your spring wardrobe. This exquisite scarf is meticulously knitted using the finest quality yarn, ensuring a soft and cozy feel against your skin. Its lightweight design makes it perfect for those breezy spring days, while the intricate patterns and delicate pastel colors evoke the beauty of blooming flowers. With its timeless design and superior craftsmanship, the Spring Blossom Scarf is a must-have accessory for any fashion-forward individual. Whether you're attending a garden party, strolling through a park, or simply enjoying a leisurely walk, this scarf will keep you stylishly comfortable throughout the spring season. Embrace the beauty of spring with the Spring Blossom Scarf and make a statement wherever you go.
Supplies:
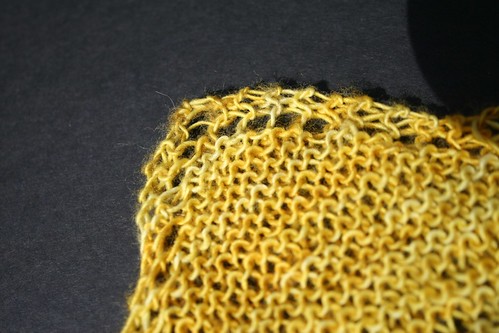
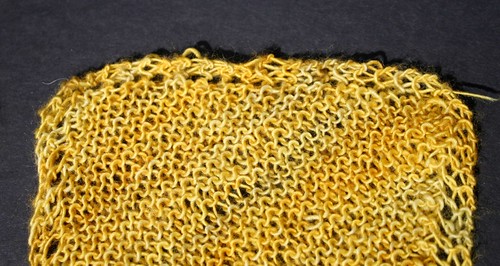
- yarn ( Prairie by Madelinetosh yarns, a laceweight, superwash merino wool in the color Candlewick. A ball is 840 yards. The amount of yarn you use will depend on how long you want the finished scarf.)
- appropriate needles (shown here on circular ebony sz 6)
Abbreviations:
- K2tog – knit two together.
- skpsso – slip one stitch from the left needle to the right needle without knitting it. knit the next stitch. Pass the slipped stitch from the left needle back to the right needle. (this is a decrease stitch)
- yo – yarn over. take the yarn around the needle. (this adds a stitch to the count.)
- (x) – the number of stitches on the needle at this time.
Pattern:
Set-up
Cast on 3 stitches.
Row 1: Knit 2, yo, knit one.
Row 2: Knit 2, yo, knit to end.
Repeat row 2 until you have a triangle that is as long on one side as you want the width of the scarf to be. (the stitches on the needle will not be the width.) For me, this was 45 stitches.
Body
Now, you are going to effectively turn, and make the length of the scarf.
On the next row, and from now on, you are going to keep the same number of stitches.
K2, yo, knit to within 5 from the end, K 2 tog, slide that stitch back to the left needle, slip the next stitch over the stitch you just made. Then transfer that stitch to the right needle. YO, K 2.
This set of stitches ensures that you will have a hole on both sides of the scarf.
Turn, and knit back
(Tip: Mark the back side of your scarf with a marker or even just thread – to keep your increases and decreases on the front side. The front and the back will be important later too.)
Repeat those two rows until the scarf is as long as you want.
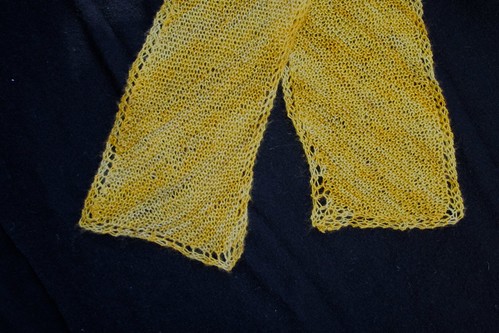
Decrease Corner
When it is as long as you would like, you are going to start the decreases.
Strangely enough, you will continue the same pattern on the front (to make sure that you still have the lovely holes that make the lace border. )
On the back you will decrease one stitch on both ends. Knit 2, skpsso, knit to within 5 of the end, K 2 tog, slide that stitch back to the left needle, slip the next stitch over the stitch you just made. Then transfer that stitch to the right needle. K 2.
Do this until you come to the row where you have 8 stitches. (This will not be enough to do the normal pattern.)The front will just work k2, skpsso, yo, k1, K 2 tog, slide that stitch back to the left needle, slip the next stitch over the stitch you just made. Then transfer that stitch to the right needle, yo, K 2.
On the back k2, skpsso, k2tog, K 2 (6)
K2, yo, k2tog, yo, k2 (7)
K2, k2tog,K 2 tog, slide that stitch back to the left needle, slip the next stitch over the stitch you just made. Then transfer that stitch to the right needle, k2 (5)
skpsso, k2tog, slide that stitch back to the left needle. slip the next stitch over the stitch you just made. (2)
K2tog. Cast off last stitch.
Leave 12 inch tail. cut yarn. Weave in ends.
The way I usually weave in ends is “straight”. And for this scarf, that got in the way, and did not look as good. You can see the yarn worming up between stitches at the top.
Instead, try weaving the yarn in a more random pattern, and down into the work. That way it will be invisible.