Knitted Bunny Peep Pattern
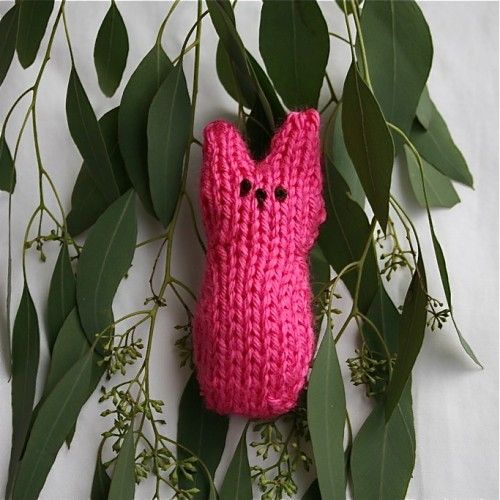
Behold the charming and endearing Bunny Peep, a delightful creation that showcases the artistry of knitting. This lovable bunny is meticulously crafted using soft and cozy yarn, skillfully woven together to form a cuddly companion that will surely capture your heart. With its intricate stitches and attention to detail, the Bunny Peep is a testament to the creativity and craftsmanship of knitters worldwide. Every stitch of this adorable bunny is carefully crafted, resulting in a unique and one-of-a-kind creation that exudes charm and personality. From its floppy ears to its fluffy tail, the Bunny Peep is a testament to the artistry and dedication of knitters who pour their heart and soul into their craft. Whether it's a gift for a loved one or a cherished addition to your own collection, the Knitted Bunny Peep is sure to bring joy and warmth to anyone lucky enough to hold it in their hands.
Supplies:
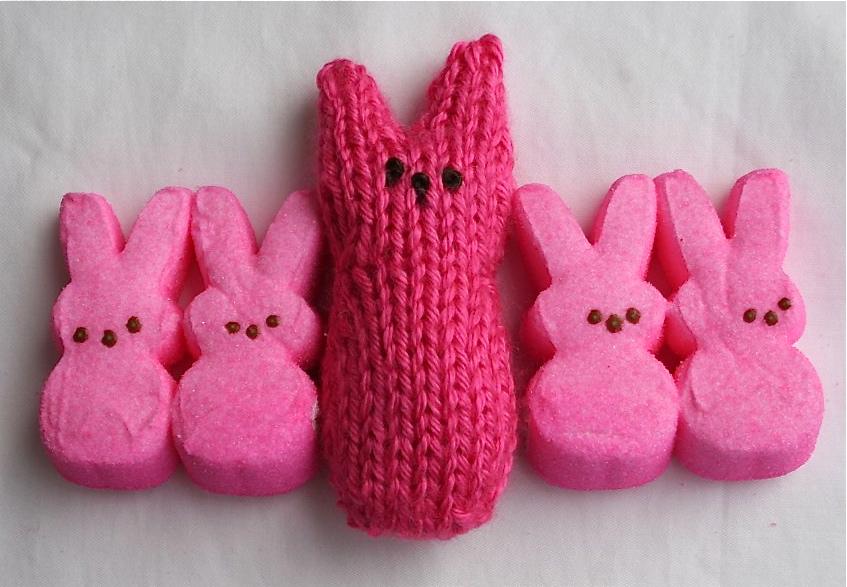
- Yarn (any peep colored yarn of your choosing. And the correct needles to obtain the gauge. Or, a little tighter. I used Caron, Simply Soft. In color “Watermelon” (not like any melon I have ever eaten. It is a jolly hot pink, as hot pink as the photos would lead you to believe) 9604
- a small amount of filling (such as fiber fill) (about a shot glass full)
- dark brown embroidery floss (for eyes and nose)
- embroidery needle
Gauge:
- Gauge is not really important here as the peep doesn’t need to fit anyone. You just want a tight knit so the filling doesn’t show through. The yarn I used called for 18 stitches over 4 inches on an 8 needle. I got about 20 stitches over 4 inches, and used a size 5 needle.
Abbreviations:
- K – knit
- P – purl
- skpsso – slip one stitch, knit the next stitch, pass the slipped stitch over the stitch you just knit. (this forms a right leaning decrease)
- K2tog – knit two together
- (X) – a number in parenthesis represents how many stitches you should have on the needle when you finish a particular row.
A note about the increases in this pattern. If you knit twice into one stitch, the result looks like a purl stitch. And we do not want a purl stitch to appear in this pattern. Here, I suggest that you increase by picking up the stitch from the row below the next stitch you are going to knit, put that loop up on the left needle, and then knit it normally.
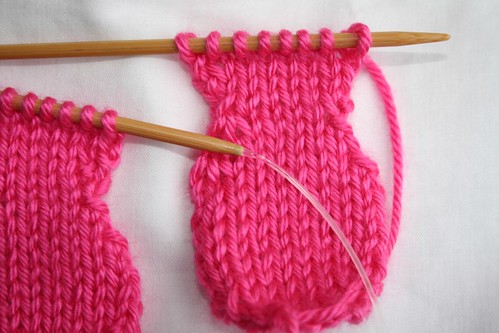
Cast on 6 stitches
row 1: Purl all stitches
row 2: K1, pick up and knit from the stitch below, K4, pick up and knit from the stitch below, K1 (8)
row 3: P
row 4: K1, pick up and knit from the stitch below, K6, pick up and knit from the stitch below, K1 (10)
row 5: P
row 6: K
row 7: P
row 8: K
row 9: P
row 10: K
row 11: P
row 12: skpsso, K6 K2tog (8)
row 13 P
row 14: skpsso, K4, K2tog (6)
row 15: P
row 16: K1, increase by knitting the stitch from the row below the next stitch, K 4, increase by knitting the stitch from the row below the next stitch, K 1. (8)
row 17: P
row 18: K
row 19: P
Now you have a body that looks like a snowman.
Put these stitches on an extra needle, and knit another one in the same manner.
Put the two body pieces together with their purl sides facing in and their knit sides facing out.
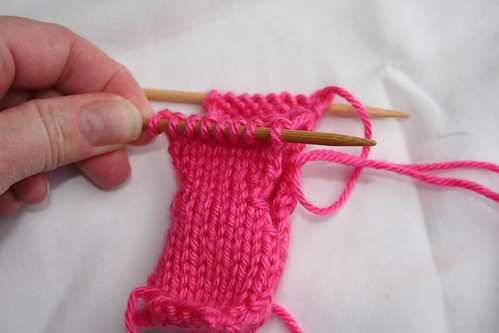
Find the body part with the yarn still attached, and start knitting with that one. Join and knit 15 of the 16 stitches. Knit the last stitch of the first round row, and the first stitch of the second round together. Mark the beginning of the round with thread, or a marker that will not fall off the needles (like a small safety pin) .
Knit 6, k2tog, k 6 (14 in a round).
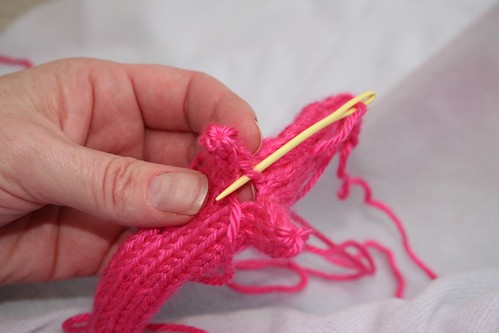
Now, you will divide the stitches and knit two ears in the round.
Each ear will have 7 stitches. You need to take half the stitches from each side of the rabbit. So with the body flat, the three stitches before the knit two together, the knit two together, and the three after will be one side, and then the same on the other side. To make this bit of knitting less tricky, you can put half the stitches on a piece of yarn as a holder.
Knit those 7 stitches for 4 rounds. Then K2tog all the way around until there are 3 stitches left. Then cut the yarn, thread it through a needle, and sew through the remaining three stitches, closing the hole at the top. Pull the yarn firmly to close the stitches, and then pass the yarn down through the middle of the ear. Repeat this process with the other 7 stitches to form the other ear.
There will be a gap between the ears. Use one of the ends that is close by to stitch up the hole. Try to mimic the actual knit stitches as much as possible, so the seaming won’t show.
Next, seam up the sides. There are lots of ends dangling, and the good news is, you do not need to weave them all in. You can simply tuck them all inside, and start seaming. Once you have the bunny about two thirds seamed, then stuff it with fiber fill. You can use the knitting needle to shove some batting up into the ears. The body does not need to be very full. In fact, peeps are a little bit flat, and to make that shape, it is better to a little bit under-stuff your knit peep.
Lastly, embroider your eyes and nose on. I did a simple french knot for all three. The faces on the actual marshmallow buddies are a little bit slap dash. So there is absolutely no need to obsess about the placement and perfection of the embroidery. I tried. And I when I let go, and went close together, it looked much better, and more realistic.
To summarize: No real concern about gauge. No need to weave in ends. No need to achiever perfection. Super cute results! That checks a lot of boxes for me!