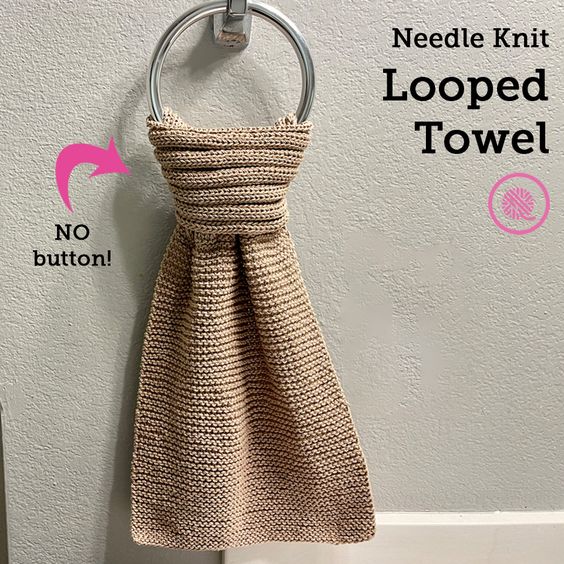
Knitted Looped Towel
Imagine a luxurious towel crafted with intricate loops and knitted with care. This knitted looped towel is not your average bathroom accessory - it is a work of art. The loops provide a unique texture that is both soft and absorbent, making it perfect for drying off after a relaxing bath or shower. The craftsmanship that goes into creating each loop adds a touch of elegance to this everyday item, elevating it to a higher level of sophistication. Whether you use it in your bathroom, kitchen, or even as a decorative accent, this knitted looped towel is sure to make a statement. Upgrade your towel collection with this unique piece that combines comfort, quality, and beauty in one delightful package.
MATERIALS
Yarn
Medium (#4) weight yarn
Yarn Bee Fundamental Cotton (164 yds./3.5 oz., 150 m/100 g) 2 balls needed. Color Camel used in sample.
Needles
US-7 (4.5 mm) circular needle with 16-20” cable
Knitter’s Pride Mindful Collection Interchangeable Lace Tips with 16” swivel cord used in sample.
Tapestry needle

ABBREVIATIONS
K = Knit
K2tog = Knit 2 stitches together
P = Purl
Pat = Pattern
Rep = Repeat
RS= Right Side
St(s) = Stitch(es)
WS= Wrong Side
GAUGE 19 sts x 36 rows in 4” (10 cm) in garter st
SKILL LEVEL Easy+
MEASUREMENTS 10” x 26” (total length before seaming/bind off)
NOTES
Three needle bind off – This bind off method involves picking up a stitch along the last garter ridge on the wrong side of the fabric, then knitting that stitch with the next live stitch on your needle. This binds off and seams the towel at the same time. Since we’re picking up stitches you don’t actually need a third needle for this variation.
INSTRUCTIONS
Cast on 48 sts
Garter st section
Row 1 (WS): Knit all.
Rep Row 1. Place marker on RS Row.
Rep Row 1 in garter st until piece measures approx 11” (approx 100 rows) ending after a WS row.
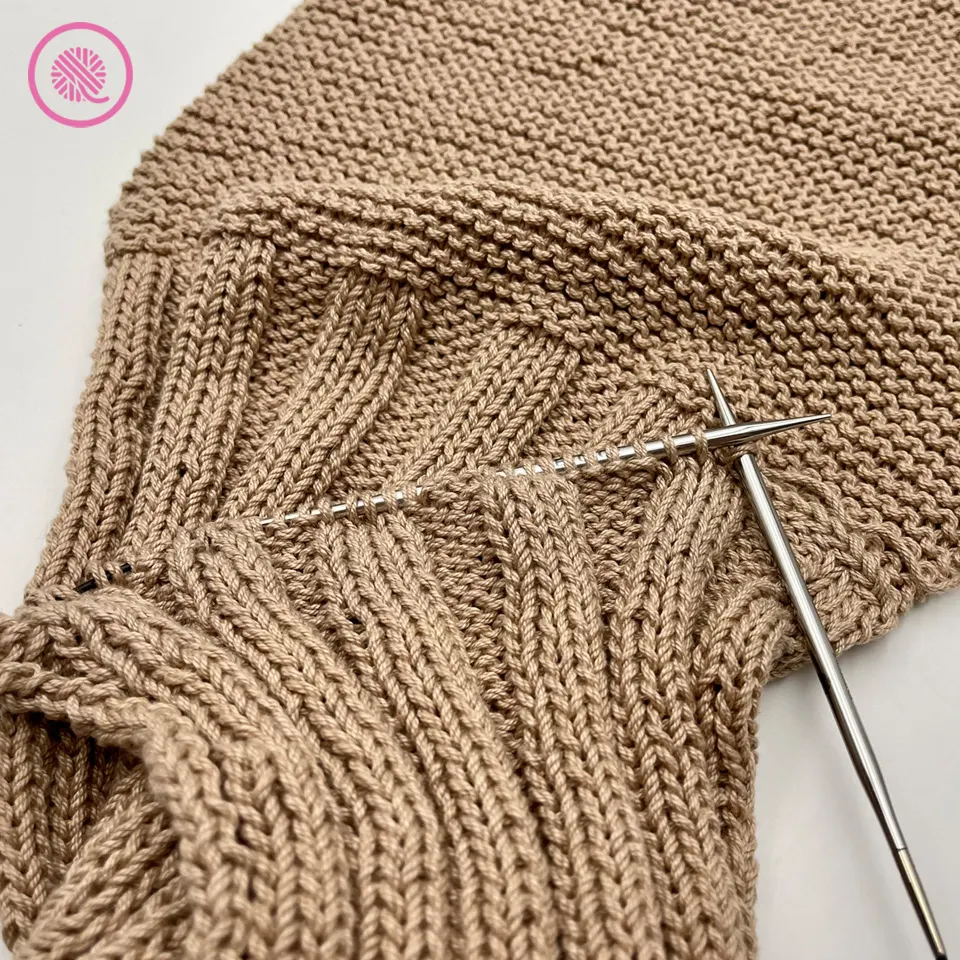
4×4 Ribbing section
Row 2 (RS): *K4, P4. Rep from * to end of row.
Rep Row 2 until ribbing section measures 15” (26” total length) ending after a RS row.
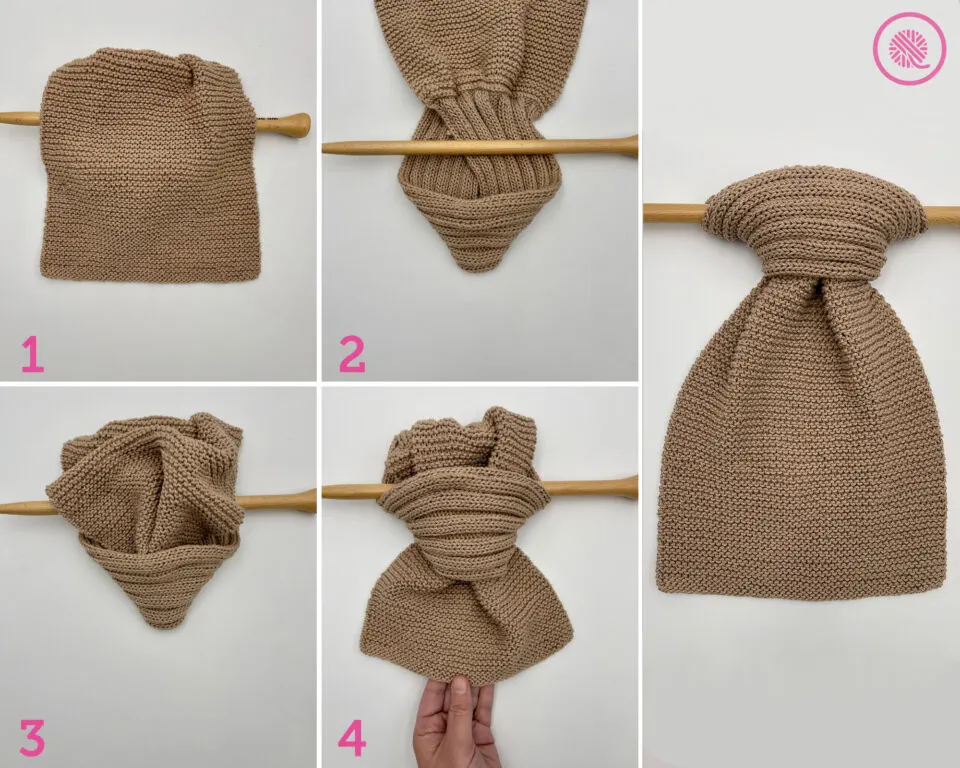
Preparing to bind off
Since the 4×4 ribbing has wide knit and purl columns, it’s important to seam your towel correctly. If you lay the towel out flat, with the RS facing you, you will notice a raised knit column on one side and curled purl column on the opposite side. You want to seam your towel so the knit column is on the inside neck edge.
Lay your towel in front of you with the RS facing up and the garter section away from you. Fold the ribbing section in half so your needle with the live stitches is lined up with the last row of garter stitches. From the edge opposite your working yarn, pick up the bottom layer (garter st section) and flip it over. (Do not flip over the entire piece; just the bottom layer.) Now line up your needle with the live sts along the last garter row and continue with bind off.
Three needle bind off
With main needle pick up first purl bump of last garter st row (looks like a smile). K2tog. Pick up next purl bump from garter stitch row. K2tog. Bind off 1 st.
*Pick up next purl bump, k2tog, bind off 1 st. Repeat from * until 1 st rem.
Cut yarn tail and pull through final st to fasten off. Weave in tails. Flip ribbing inside out so seam is on the WS.
Hang on towel bar, ring or oven door:
- With RS facing you fold the ribbing back over the top of the bar.
- Lift the bottom of the towel up and bring the ribbing loop under the hanging towel.
- Tuck bottom of the towel through top of ribbing loop.
- Tug downward until the whole towel is exposed and the beginning of ribbing section is covered by the ribbed loop.