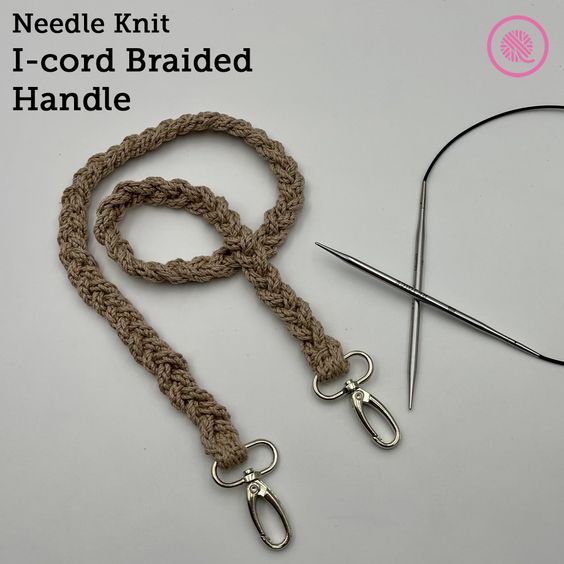
Knitted I-Cord Braided Handle/Strap
Create a unique handle or strap by braiding together knitted I-Cord strands. This technique involves knitting a long, narrow tube of fabric known as I-Cord, then braiding multiple strands together to form a sturdy and decorative handle. By combining different colors or textures of yarn, you can customize the look of the braided handle to match your project perfectly. This method adds a touch of elegance and sophistication to bags, purses, or other accessories. Additionally, the braided design adds a tactile element to the handle, making it comfortable to hold and easy to grip. Whether you're knitting a tote bag, a shoulder purse, or a market bag, incorporating a knitted I-Cord braided handle will elevate the overall look and feel of your project.
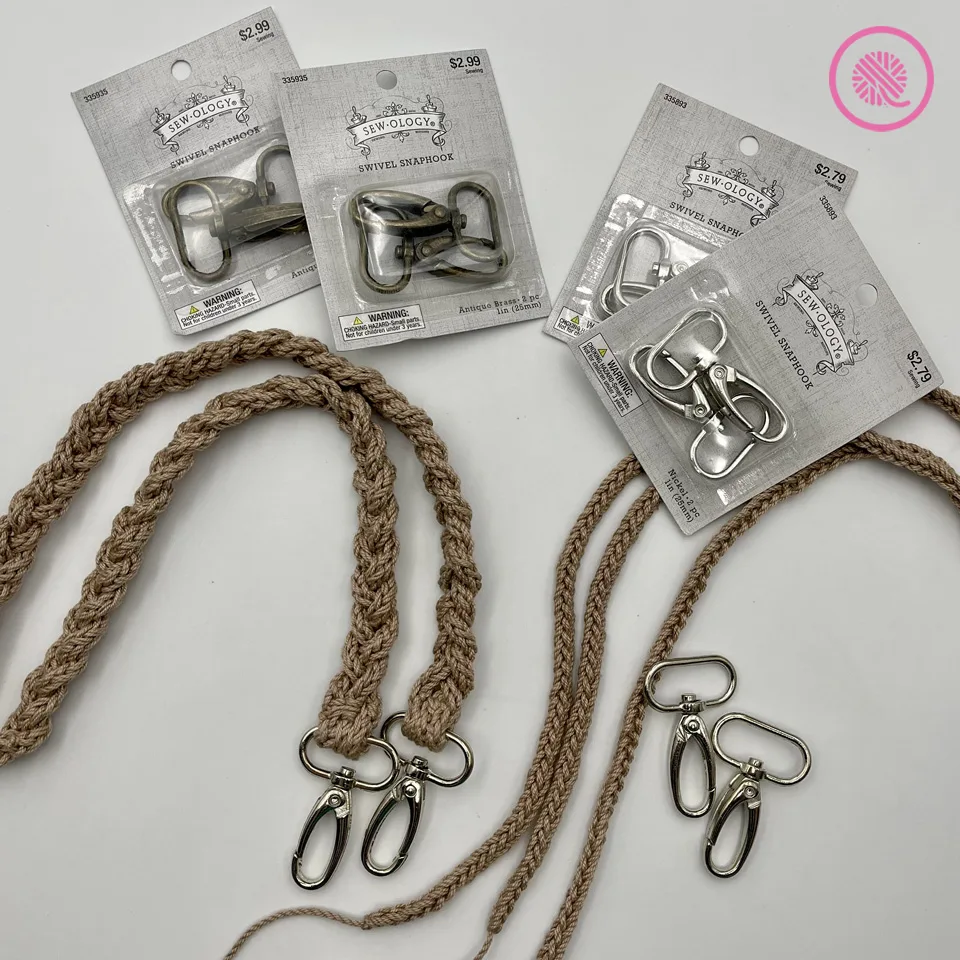
MATERIALS
Yarn
Medium (#4) worsted weight yarn
Yarn Bee Fundamental Cotton (164 yds./3.5 oz., 150 m/100 g) 1 ball needed. Color Camel used in samples.
Needles
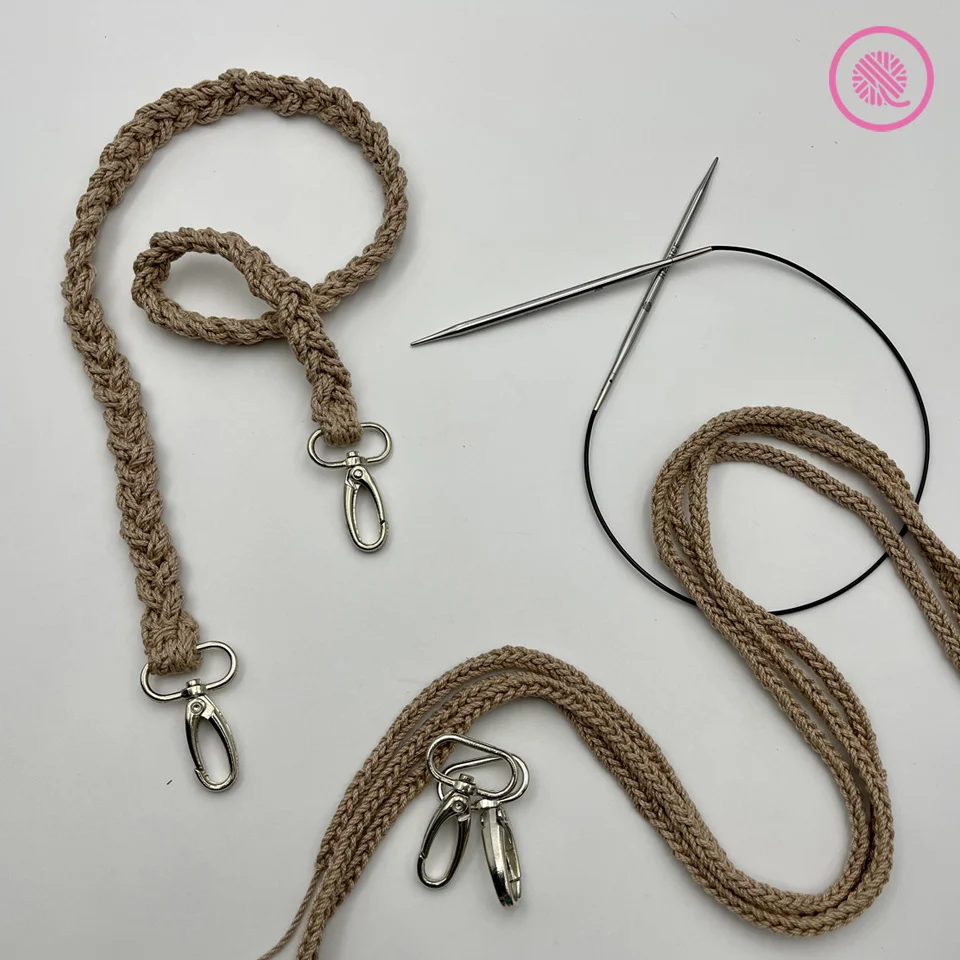
US 7 (4.5 mm) circular needle with 16” cord
Knitters Pride Mindful Collection Lace Tips used in sample.
Notions
Tapestry needle
Measuring tape
Locking stitch marker (large) or large safety pin
1” Swivel Snap Hooks – 2 per strap
ABBREVIATIONS
Approx = Approximately
RS = Right side
St(s) = Stitch(es)
SKILL LEVEL Easy
MEASUREMENTS Approx .5” x 30” (1.3 cm x 76 cm) including hooks
NOTES
This pattern uses three 2-stitch i-cords braided together. Braiding the i-cords and seaming shortens the total length so knit each i-cord at least 2” longer than the length you desire for your final strap.
Swivel Snap Hooks: This product is sewn to either end of the strap and clips onto your bag. This allows you to change the straps. They are found at the affiliate link listed above or in the sewing notions area of your local craft store.
INSTRUCTIONS
Makes 1 braided strap.
Knit 3 I-cords:
- Cast on 2 stitches leaving a 12-18” tail.
- Knit both stitches.
- Next without turning your work,
- If using straight needles, slip your stitches back onto your non-working needle.
- If using DPNs or circular, slide your stitches to the other end of your needle.
- Keep on RS and knit both stitches. (NOTE: Your working yarn should be in the back coming from the last stitch in the row.)
- Repeat Steps 2-4 until your i-cord measures 32” or until your desired length plus 2”. (NOTE: Remember to tug on your i-cord to lengthen and set the stitches before you measure.)
- Bind off both stitches and cut yarn leaving a 12-18” yarn tail for seaming. Tug on yarn tail to tighten.
Repeat Steps 1-6 to make 3 i-cords.
Seam I-cord ends:
Lay all three cords on table next to each other lining up the end of each cord and making sure the ends are not twisted. Measure 1” (approx. 5-6 rows) from edge of cords. On next row secure all 3 i-cords together with a large stitch marker making sure to go through the middle of each cord.
Now we are going to attach the ends of the i-cords into a flat panel. Using yarn tail from middle cord, sew through the first stitch of one of the outer cords. Sew through the edge of the stitch on the row above before sewing through the first stitch on all three cords. Now continue sewing through all 3 cords row by row up to the stitch marker. Working back in the opposite direction, continue sewing through all 3 cords row by row back to the beginning. Weave in tail and cut.
Attach first swivel snap hook:
Slide swivel hook into place pulling through remaining tails. Fold over to line up cord end to stitch marker. Using one yarn tail, sew through both layers from one side to the other making to sure to sew through each i-cord. Sew back through to other side to reinforce. Weave in tail and cut. Repeat this process on the next row down with the other yarn tail. This creates a strong secure seam for the hook. Remove stitch marker.
Braid:
Secure the hook to a table using tape or clip onto something secure for tension. Make a simple 3-strand braid using the instructions below.
- Pick up one outer strand and place it crossing the center stand. Pull the center strand toward the outside edge.
- Pick up the opposite outer strand and cross it over the center strand. Pull the center strand toward the outside edge.
- Repeat Steps and 1 and 2 alternating sides finishing when you have 1” of the i-cord left.
Secure with locking stitch marker as you did with the other end making sure not to twist the cord ends.
Seam ends and attach second hook:
Repeat instructions above to sew the three cords together then attach the second hook.
Repeat all steps to make another strap, if needed.