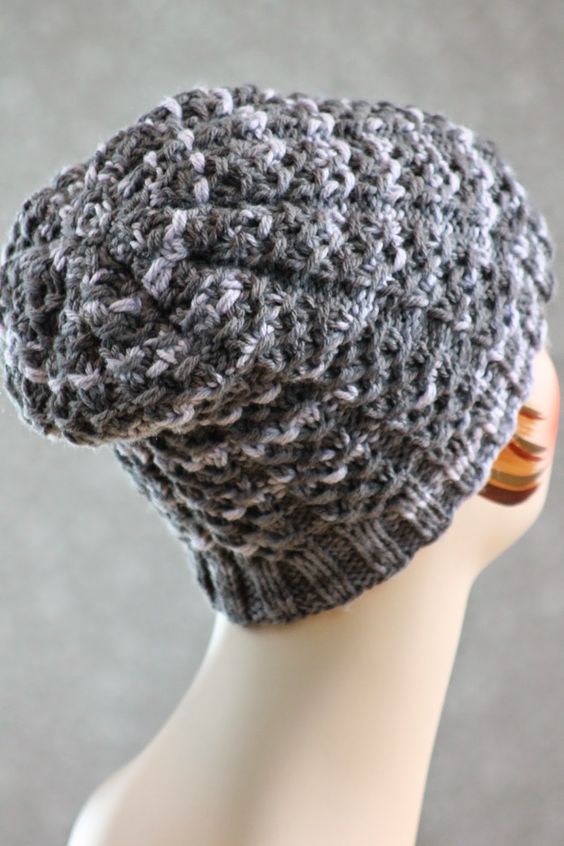
knitted Stepping Stones Beanie
Introducing the Stepping Stones Beanie, a cozy and stylish headwear accessory that will keep you warm and fashionable during the colder months. This beanie is meticulously crafted using the art of knitting, ensuring a high-quality and durable product that will stand the test of time. The intricate knitted pattern resembles stepping stones, adding a unique and eye-catching element to your winter wardrobe. The knitted design creates a textured surface that not only looks visually appealing but also provides extra warmth and insulation. Whether you're strolling through the city streets or enjoying a winter hike, the Stepping Stones Beanie will keep you cozy and effortlessly chic.
Yarn: Berroco Vintage Colors (50% Acrylic, 40% Wool, 10% Nylon; 217 yards [200 meters]/100 grams); #5215 Smokestack - one skein
Needles: one 16" circular needle in size US 6, one 16" circular needle in size US 8, and one set of double pointed needles (dpns), also in size US 8
Notions: Tapestry needle, stitch marker
Gauge: 18 stitches = 4 inches in stockinette
So let's make a hat! Using your size 6 circular needle, cast on 96 stitches, place marker, and join in round. Then we'll knit the following ribbing row:
Ribbing Row: * p1, k2, p2, k2, p1; rep from *
Knit this ribbing row 8 times, and then switch to your size 8 circular needle (or a 10, if you want to make a slouchier hat. Let me reiterate: I want pictures!). Now, we'll move on to the main pattern, for which we'll need the following notation:
Cluster 2 (c2): slip 2 stitches with yarn in front, bring yarn to back between needles, slip the same 2 stitches back to your left hand needle, pass yarn to front between needles, and then slip the same to stitches with yarn in front again
So let's proceed as follows:
Row 1: * p1, k1, yo, k2tog-through back loops, k2tog, yo, k1, p1 *
Row 2: * p1, k2, c2, k2, p1 *
Row 3: * p1, k1, k2tog, (yo) twice, k2tog-through back loops, k1, p1 *
Row 4: * p1, c2, k1 in 1st yo, k1-back in 2nd yo, c2, p1 *
Knit rows 1 - 4 until hat measures roughly 8" and you've just completed row 4 of the pattern. Now it's time to begin our decreases, which will go as follows:
Decrease Row 1: * p1, k1, yo, k2tog-through back loops, k2tog, yo, k1, p2, k1, k2tog-through back loops, k2tog, k1, p1 *
Decrease Row 2: * p1, k2, c2, k2, p2, k1, c2, k1, p1 *
Decrease Row 3: * p1, k1, k2tog, (yo) twice, k2tog-through back loops, k1, p2, ssk, k2tog, p1 *
Decrease Row 4: * p1, c2, k1 in 1st yo, k1-back in 2nd yo, c2, p2, k2, p1 *
You may want to switch to your dpns about now...
Decrease Row 5: * p1, k1, k2tog-through back loops, k2tog, k1, p2, k2, p1 *
Decrease Row 6: * p1, k1, c2, k1, p2tog, c2, p1 *
Decrease Row 7: * p1, ssk, k2tog, p4 *
Decrease Row 8: with yarn in back, slip first stitch from 1st dpn to end of 3rd; then, * k2, p3, p2tog *
Decrease Row 9: * k2, (p2tog) twice *
Decrease Row 10: * c2, p2tog *
Decrease Row 11: * p3tog *
Clip tail, thread through final 6 stitches, and pull tight. Thread to inside of hat and knot. Tuck in ends.