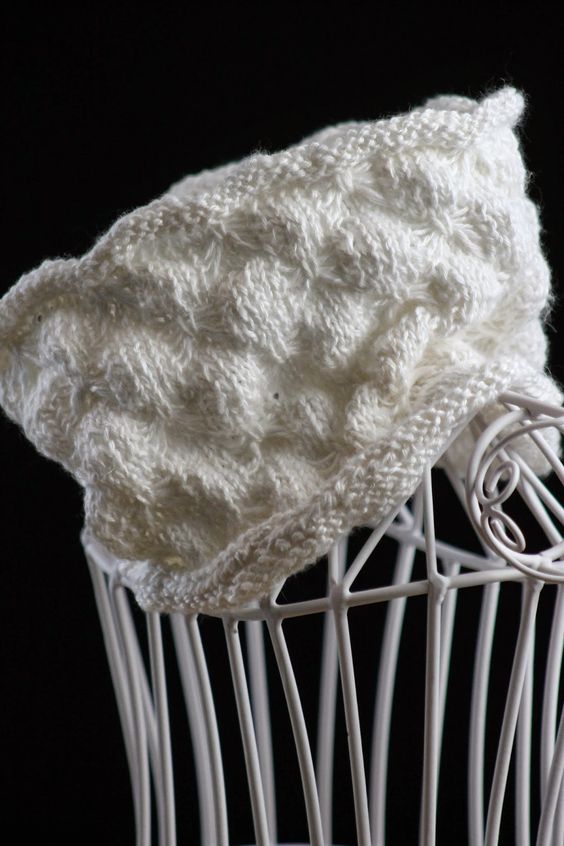
Knitted Butterfly Stitch Cowl
Imagine a cozy cowl made with a unique butterfly stitch pattern, created with the art of knitting. This beautiful accessory is not only stylish but also adds a touch of whimsy to any outfit. The intricate design of the butterfly stitch gives the cowl a delicate and feminine look, perfect for adding a pop of texture to your wardrobe. Whether you're dressing up for a special occasion or simply want to stay warm and fashionable on a chilly day, this knitted butterfly stitch cowl is a versatile and eye-catching accessory that is sure to turn heads. The butterfly stitch pattern adds depth and dimension to the cowl, creating a piece that is both visually stunning and cozy to wear. Whether you're a seasoned knitter looking for a new challenge or a beginner wanting to try your hand at a more intricate stitch, this knitted butterfly stitch cowl is a fun and rewarding project that will result in a one-of-a-kind accessory that you'll love to wear.

Sizes: Toddler (Child; Adult)
Yarn: Plymouth Yarn Linen Concerto (48% Rayon, 42% Linen, 10% Cotton; 101 yards [92 meters]/50 grams); #01 Cream - 2 skeins (2 - 3 skeins, depending on length; 3 skeins)
Needles: 16" circular needle in size US 5
Notions: Tapestry needle, stitch marker
Gauge: 22 stitches = 4 inches
So let's get started! First, cast on 100 (110; 120) stitches, place marker, and join in round. Then we'll knit five set-up rows, as follows:
Set-up Rows 1 - 4: purl
Set-up Row 5: knit
And now let's move on to the main pattern, which is Butterfly Stitch from page 101 of Barbara G. Walker's A Treasury of Knitting Patterns, except adapted for the round. Before we get to that, however, let's define our butterfly stitch as follows:
bs (butterfly stitch) (yes this abbreviation makes me happy): slip 1 stitch purlwise (this stitch should be the middle stitch above your five slipped bars), then insert right-hand needle down behind 5 bars and pull them up, then insert left-hand needle up behind the 5 bars (which will orient them knitwise). Finally, slip middle stitch back to left-hand needle and knit all 5 bars and middle stitch together
Or if that seems like an awful lot of boring reading, you can also watch my very first instructional video. Don't judge my scratched-up hands! It's the baby's fault, I swear - the kid's got some serious nails!!!
Anyway, now that that's covered we'll proceed as follows. As always with slipped stitches, remember to keep your yarn LOOOOOOOOOSE. Or in other words, spread those stitches out when slip the yarn in front of them; otherwise, your pattern will be much less pretty.
Rows 1, 3, 5, 7, & 9: * k5, slip 5 with yarn in front (wyif); rep from *
Rows 2, 4, 6, 8: knit
Row 10: * k7, bs, k2 *
Rows 11, 13, 15, 17, & 19: * slip 5 wyif, k5 *
Rows 12, 14, 16, & 18: knit
Row 20: * k2, bs, k7 *
Knit rows 1 - 20 twice (three times; four times) (NOTE: if you're making this cowl for an older toddler, I recommend knitting rows 1 - 20 three times; similarly, if you're making this cowl for an older child, I recommend knitting rows 1 - 20 four times - obviously, these adjustments will mean you may need more yarn). Then knit the following finish rows:
Finish Row 1: knit
Finish Rows 2 - 5: purl
Bind off loosely and tuck in ends. If desired, stitch purled edgings in place where they naturally curl under. Block, if desired (the fabric will have a naturally bumpy texture if left unblocked, which I dig. I imagine you can flatten it out by stretching it a bit when you block it).