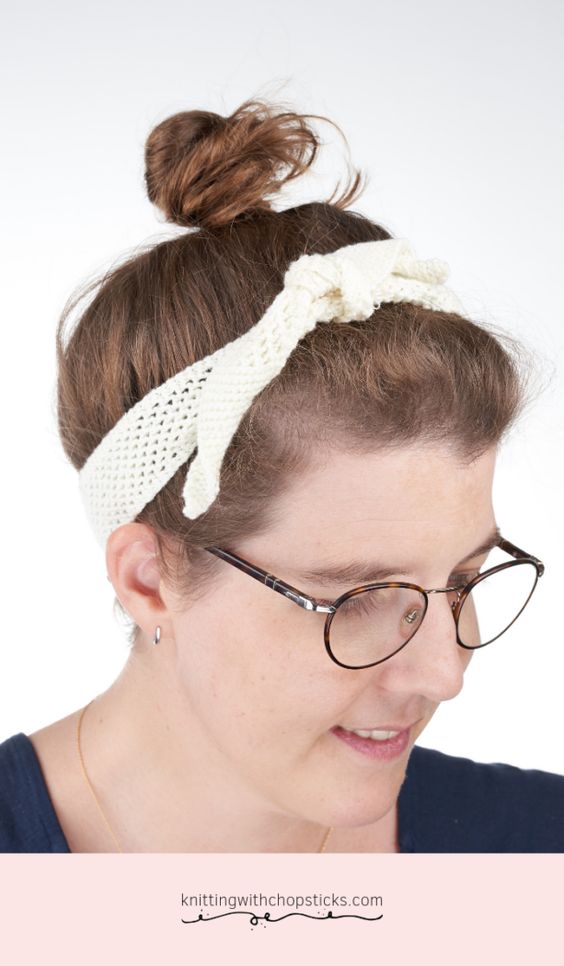
Knitted Lacy Headband
Crafted with intricate patterns and delicate stitches, this elegant headband is a stylish accessory that adds a touch of sophistication to any outfit. The lacy design gives it a feminine and romantic look, perfect for both casual and formal occasions. The soft, knitted fabric ensures a comfortable fit that stays in place all day long, making it a practical and fashionable choice for those looking to elevate their hairstyle. This headband is a versatile piece that can be worn in various ways, whether you prefer to wear it as a statement piece or simply to keep your hair out of your face. The intricate details of the knitwork make it a unique and eye-catching accessory that is sure to turn heads. With its timeless design and high-quality craftsmanship, this knitted lacy headband is a must-have for anyone looking to add a touch of elegance to their wardrobe.
Materials
- 2.5 mm knitting needles
- Less than half a skein of Bamboo cotton yarn. This yarn is super soft and delicate, I just love it.
- Tapestry needle to weave in the ends. I love this set as it has different eye sizes for different yarn thicknesses and it comes in a small tube which is very convenient so I don’t lose them.
- T pins for blocking
Abbreviations
- st = stitch
- k = knit (k2 means knit 2 stitches)
- inc = increase. I use the knit 2 stitches in the same stitch method (also known as kfb)
- k2tog = knit 2 stitches together
- yo = yarn over = bring the yarn forward
Using the lace stitch below, the gauge is 28 st by 54 rows for a 10cm by 10cm square
Repeat instructions between ** the indicated number of times or until the end of the row.
Size
I have indicated standard sizes as follows adult (baby, toddler, child, tween).
To adjust the pattern to your head size, measure the diameter of your head and replace the 57cm / 22 1/2″ below (in the lace part) with your measure.
Lacy Headband Actual Pattern
The Biased Beginning
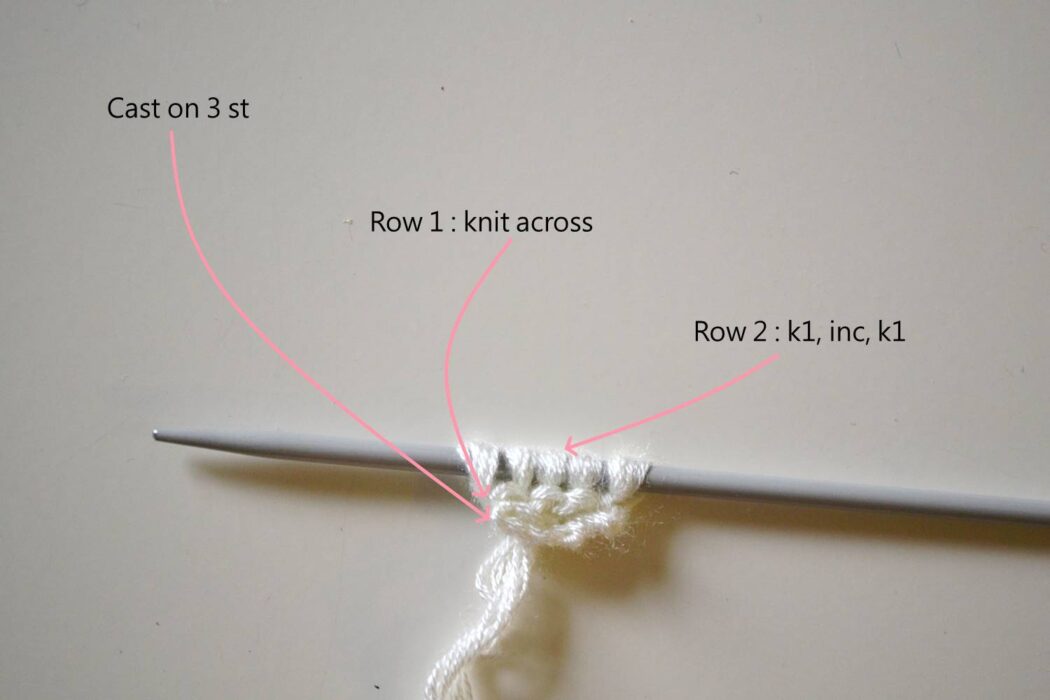
Cast on 3 st
Row 1: k across
Row 2: k1, inc, k1
Row 3: k across
Row 4: k until last 2 st, inc, k1
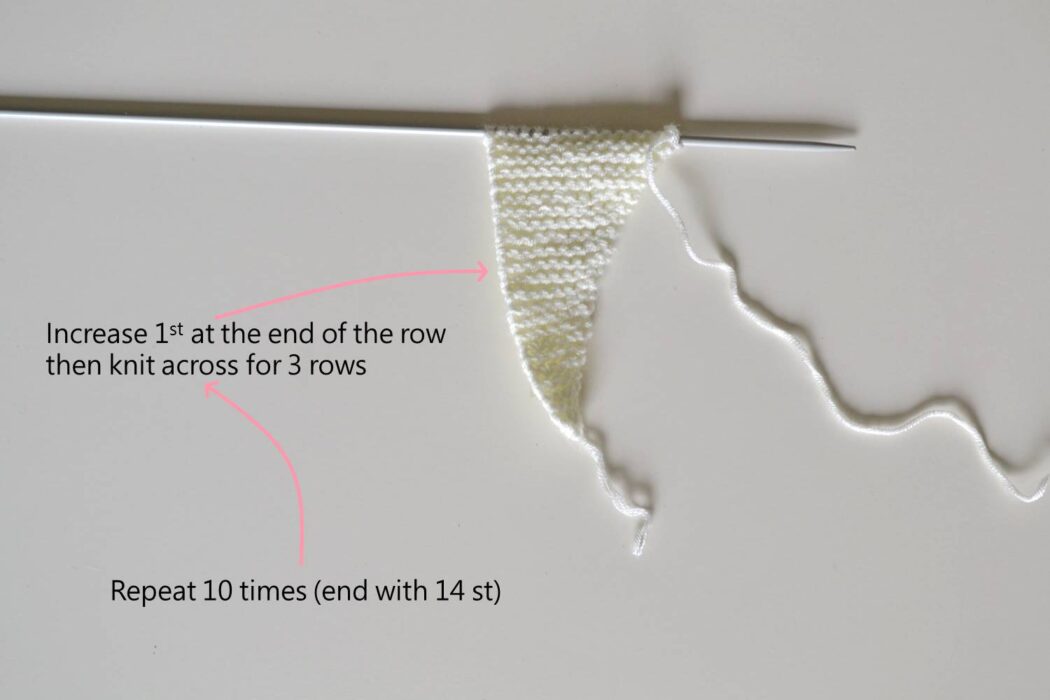
Row 5 – 6: k across
Repeat *rows 3 to 6* 10 times (14st)
The Main Laced Part
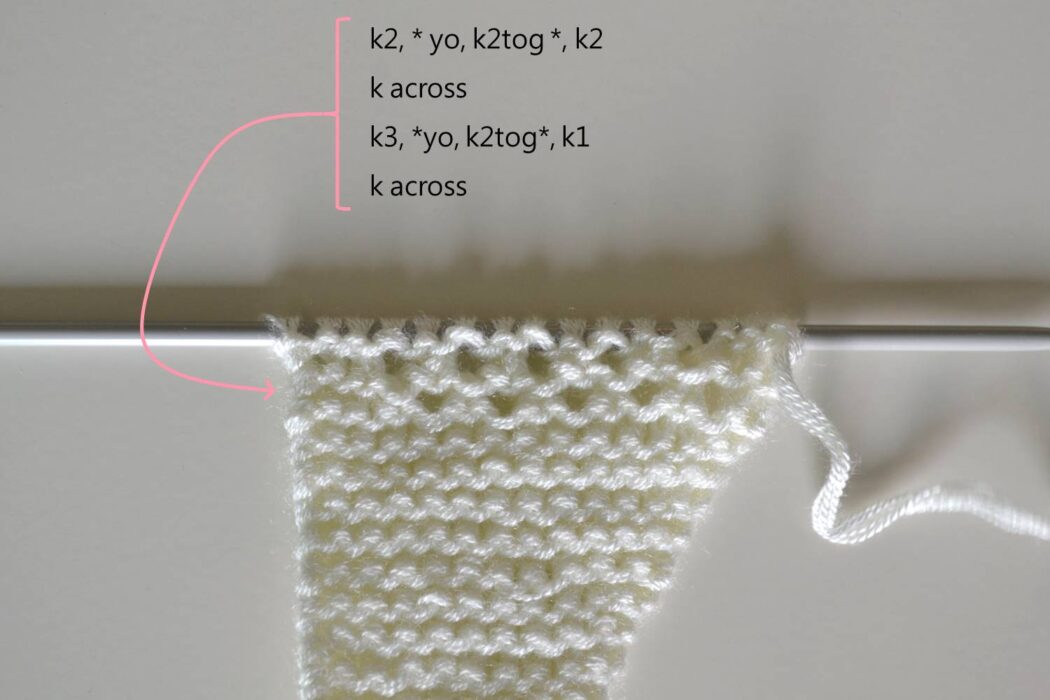
Row 1: k2, *yo, k2tog*, k2
Row 2: k across
Row 3: k3, *yo, k2tog*, k1
Row 4: k across
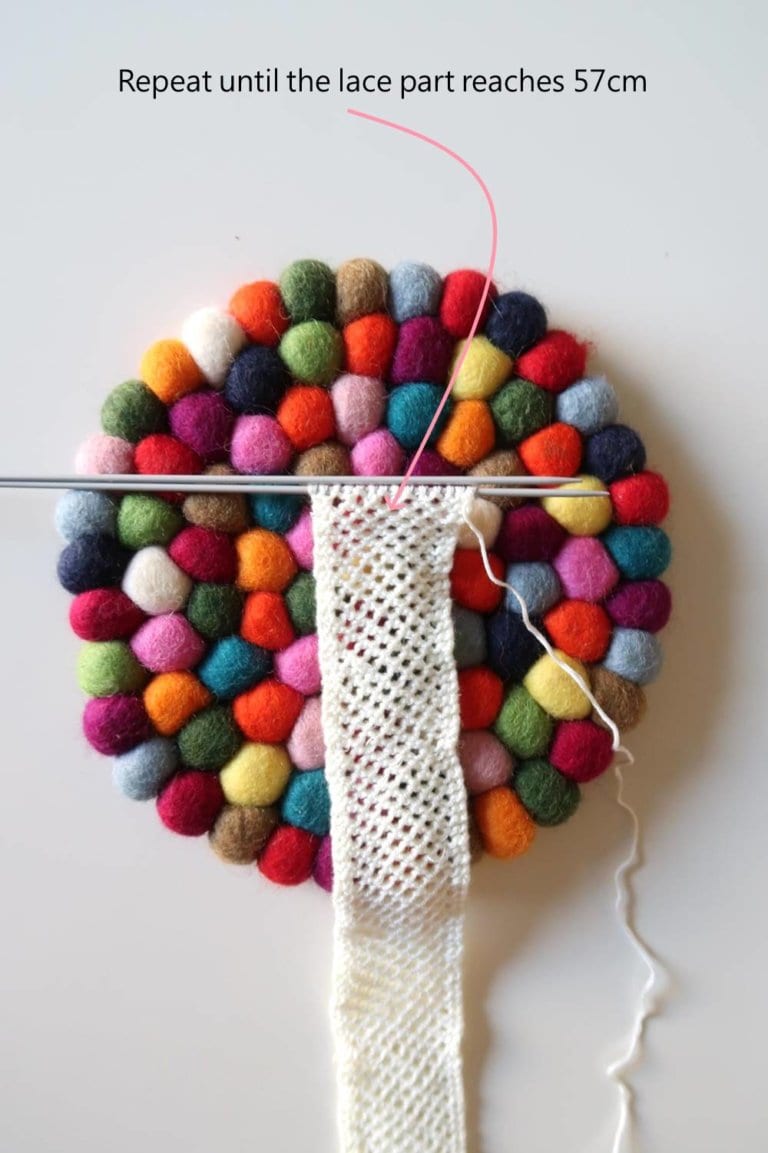
Repeat *rows 1 to 4* until you reach 57 cm / 22 1/2″ (37 cm / 14.5″, 43cm / 17″, (49 cm / 19″, 53 cm / 20 3/4″) for the laced part.
The Biased End
Row 1 – 2: k across
Row 3: k until last 2 st, k2tog
Row 4: k across
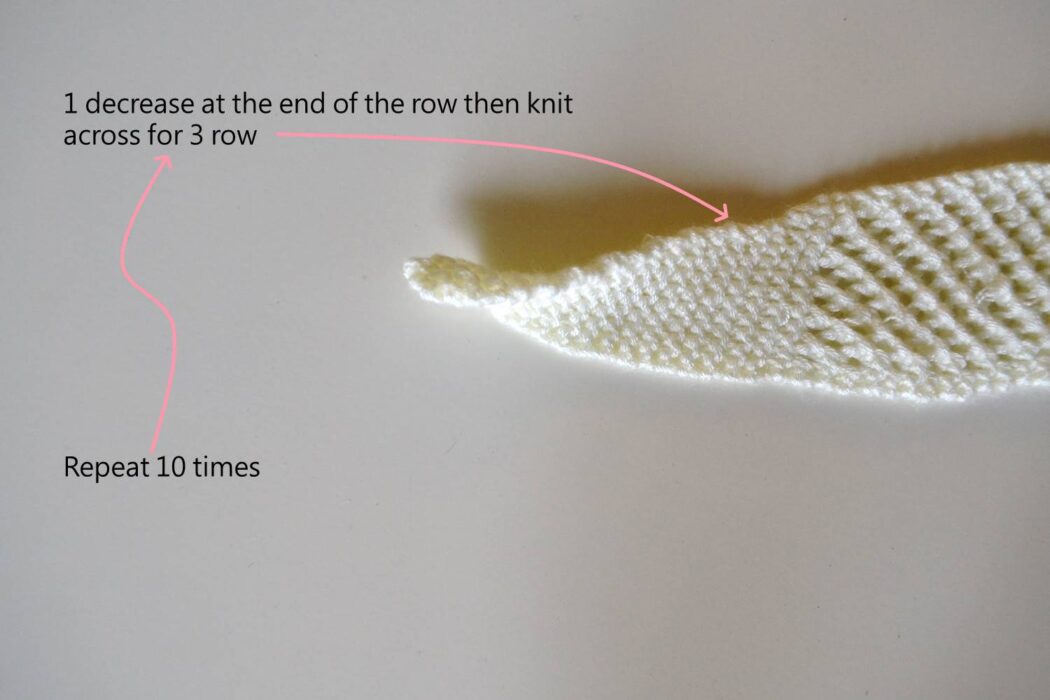
Repeat *rows 1 to 4* 10 times
Cast off the remaining 3 stitches.
Blocking
Lightly block your headband without stretching it. To do this, humidify your headband and pin it to your blocking mat.
Don’t skip this step as it can make a huge difference.
Once it is completely dry, remove the pins. Your headband is ready to be worn. Tie a not and wear it however you want. The possibilities are endless.