Knitted Winter Cowl
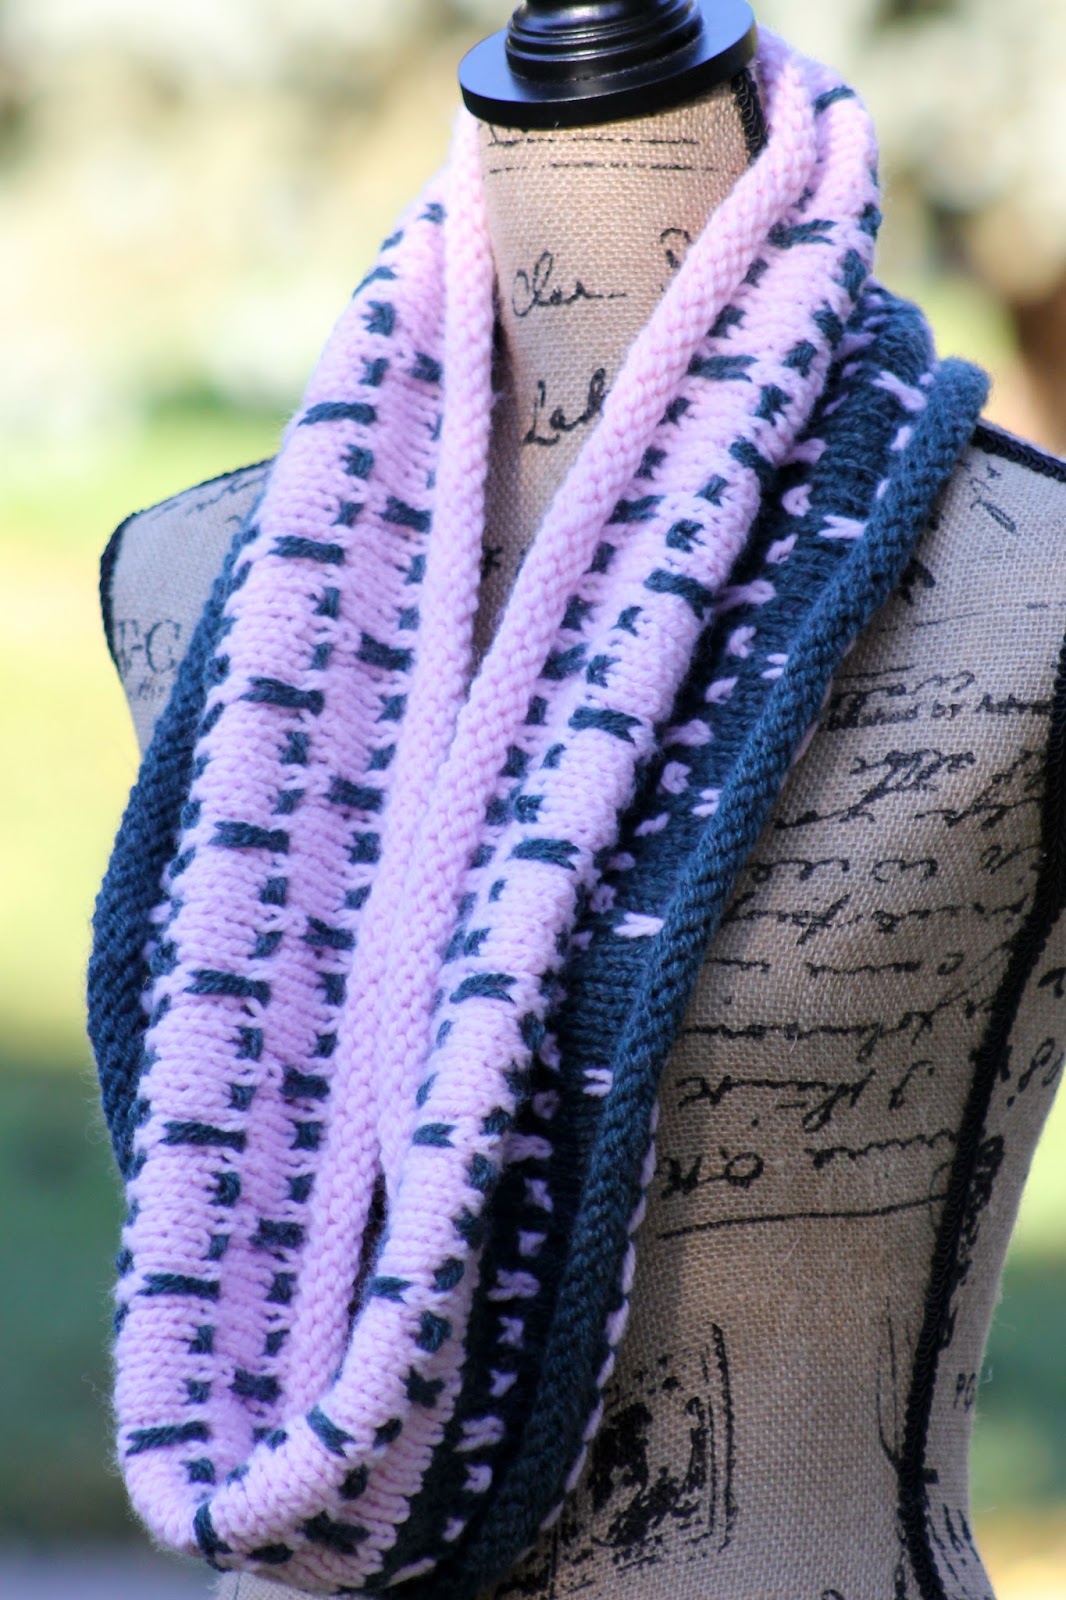
Imagine a cozy winter accessory that wraps around your neck like a warm hug. This handcrafted cowl is made from soft, luxurious yarn that has been carefully knitted to create a beautiful and functional piece. The intricate stitching adds a touch of elegance to your winter wardrobe, while also providing much-needed warmth during the chilly months. This stylish winter cowl is the perfect addition to any outfit, whether you're heading out for a day of shopping or just taking a leisurely stroll through the snow-covered streets. The versatility of this knitted accessory allows you to wear it in a variety of ways, making it a must-have item for the colder seasons. With its timeless design and high-quality craftsmanship, this winter cowl is sure to become a staple in your wardrobe for years to come.
Yarn: Plymouth Yarn Encore Chunky (75% Acrylic, 25% Wool; 143 yards [131 meters]/100 grams); #029 Pastel Pink - one skein (color A), & #0670 Teal Heather - one skein (color B)
Needles: One 32" circular needle in size US 10, one 32" or longer circular needle in similar needle size (to hold one half of work for grafting) (also, you don't need this needle if you're going to knit straight through instead of grafting)
Notions: Tapestry needle, stitch marker
Gauge: 14 stitches = 4 inches
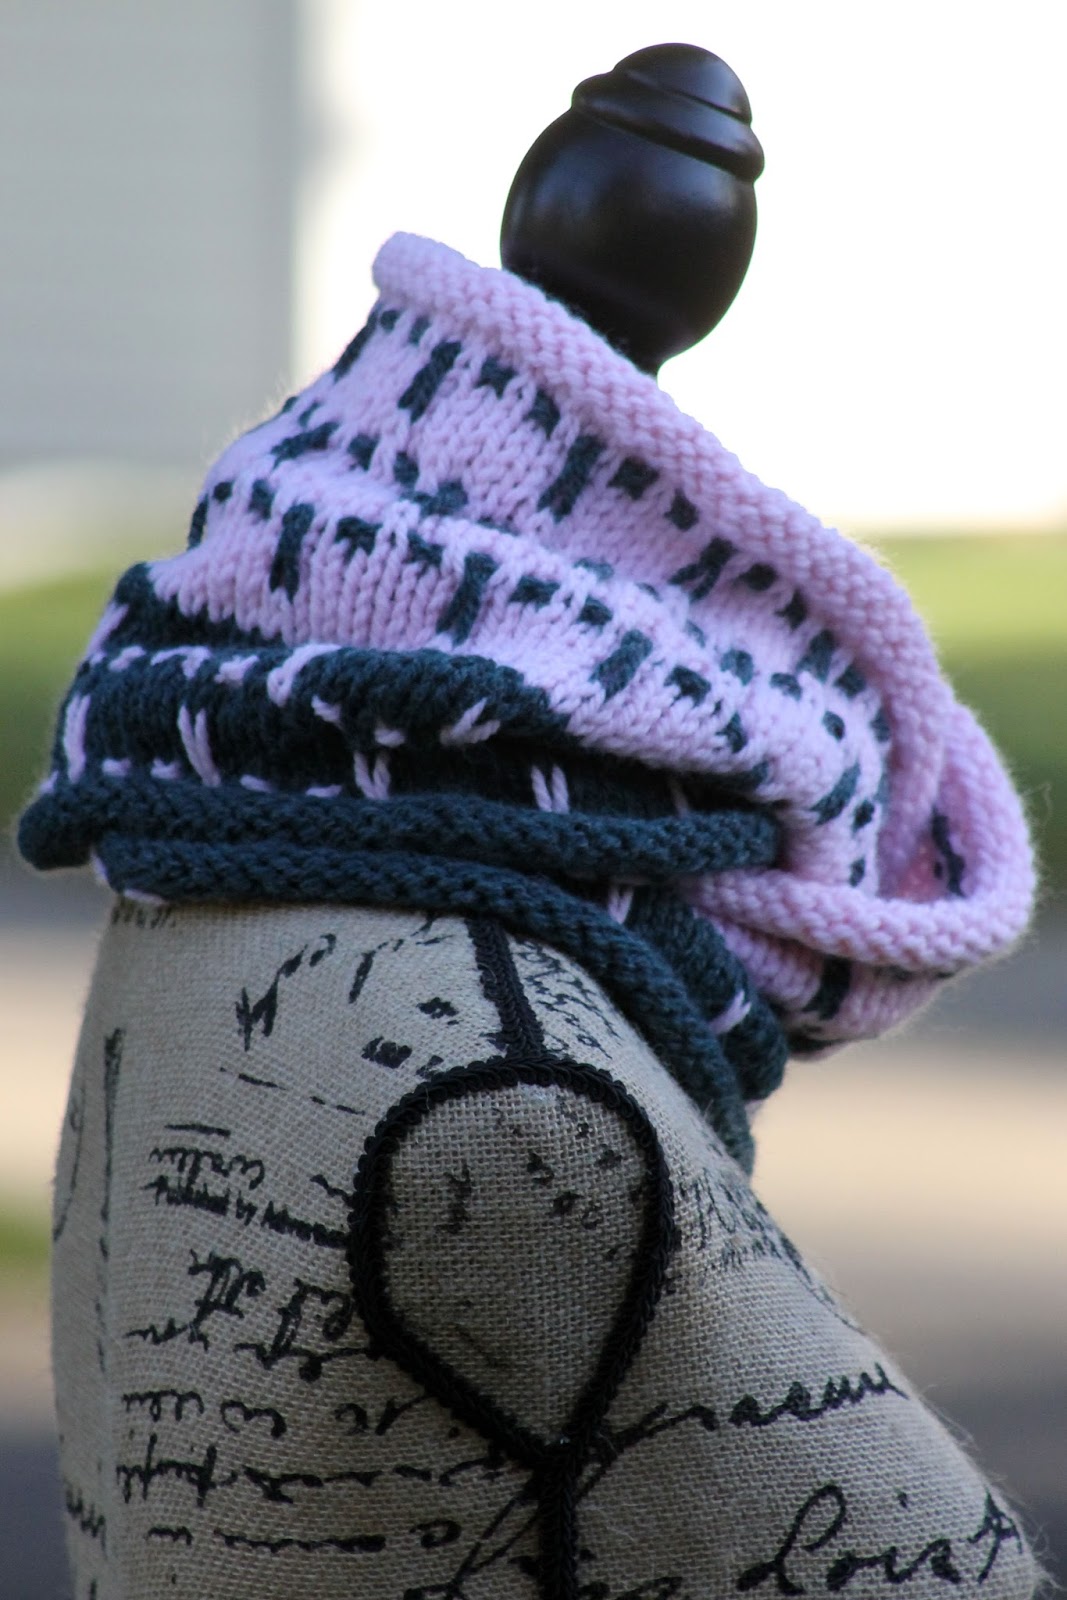
So let's make a cowl! Of course, before we get started, I should mention one thing. Namely, that I made this cowl in two halves and then grafted them together because I wanted the long slipped stitches in contrasting colors to face each other, rather than continue in the same direction (as you can see in the picture above). If you'd rather not graft a whole heck of a lot of stitches together and/or if you prefer to have all of your long slipped stitches oriented in the same direction, I'll give alternate directions for that option below.
However, no matter which way you're making this thing, you will begin like so: using your 32" circular needle in size US 10 and your color A yarn, cast on 138 stitches, place marker, and join in round. Then we'll knit a few edging rows, like so:
Edging Row: using color A, purl
Knit this edging row 4 times. Then, we'll begin our main pattern. And it goes like so:
Rows 1 - 2: using color A, knit
Row 3: using color B, * slip 1 with yarn in back (sl1 wyib), k1; rep from *
Row 4: using color B, * (slip 1 wyib, p1) twice, sl1 wyib, k1 *
Rows 5 - 8: using color A, * k5, slip 1 wyib *
Rows 9 & 10: using color A, knit
Row 11: using color B, * k1, sl1 wyib *
Row 12: using color B, * p1, sl1 wyib, k1, sl1 wyib, p1, sl1 wyib *
Rows 13 - 16: using color A, * k2, sl1 wyib, k3 *
Knit rows 1 - 16 once, and then knit rows 1 - 10 once again. If you're going for the grafting option, as I did in the cowl pictured, now's the time to transfer this half to your spare needle. If you're not, then skip down below, as I'll resume your instructions after I finish up with the grafted cowl.
So, if you're grafting, you should now be at a point where your first half is on your spare needle and your 32" size 10 needle is free. Then, using this needle and your color B yarn, cast on 138 stitches, place marker, and join in round. Again, we'll knit a few edging rows, like so:
Edging Row: using color B, purl
Work this edging row 4 times. Then we'll go back to our pattern, except in opposite colors. And it goes like so:
Rows 1 - 2: using color B, knit
Row 3: using color A, * slip 1 with yarn in back (sl1 wyib), k1; rep from *
Row 4: using color A, * (slip 1 wyib, p1) twice, sl1 wyib, k1 *
Rows 5 - 8: using color B, * k5, slip 1 wyib *
Rows 9 & 10: using color B, knit
Row 11: using color A, * k1, sl1 wyib *
Row 12: using color A, * p1, sl1 wyib, k1, sl1 wyib, p1, sl1 wyib *
Rows 13 - 16: using color B, * k2, sl1 wyib, k3 *
Work rows 1 - 16 and then work row 1 again. Using your color B yarn, which you can leave attached to your second half, use the Kitchener stitch to graft the two halves together from the row break. Since you're grafting so many stitches you probably won't to work with a yarn tail that's long enough to finish the entire graft (I started with 120" and got a bit over halfway through, I think), but it's nice to begin with it attached anyway. Once you're done grafting, tuck in ends and block, allowing the purled edging to continue to roll in naturally (but blocking the snot out of the rest of it, since slipped stitch patterns like to curl).
If you don't want to graft, here's where you'll resume. You've just knit
rows 1 - 16 once, and then knit rows 1 - 10 once again. And now, you'll simply continue knitting, except with the colors reversed as I've outlined below:
Rows 1 - 2: using color B, knit
Row 3: using color A, * slip 1 with yarn in back (sl1 wyib), k1; rep from *
Row 4: using color A, * (slip 1 wyib, p1) twice, sl1 wyib, k1 *
Rows 5 - 8: using color B, * k5, slip 1 wyib *
Rows 9 & 10: using color B, knit
Row 11: using color A, * k1, sl1 wyib *
Row 12: using color A, * p1, sl1 wyib, k1, sl1 wyib, p1, sl1 wyib *
Rows 13 - 16: using color B, * k2, sl1 wyib, k3 *
Work rows 1 - 16 and then work rows 1 & 2 again. Using color B, purl four rows around. Tuck in ends and block, allowing the purled edging to continue to roll in naturally (but, as I said above, blocking the snot out of the rest of it, since slipped stitch patterns like to curl).