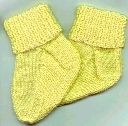
Knitted Baby Socks
Crafted with love and care, these adorable baby socks are the perfect accessory to keep your little one's tiny feet warm and cozy. Made from soft and breathable knitted fabric, these socks provide utmost comfort for delicate baby skin. The intricate knitting pattern adds a touch of elegance and charm, making these socks a stylish addition to any baby's wardrobe. Whether you're dressing up your little one for a special occasion or simply keeping their feet warm during playtime, these knitted baby socks are a must-have accessory for every parent.
Materials:
For this size (toddler 4-1/2" from heel to toe), I used baby weight yarn; 1 skein (1.75 ozs.) made 2 pairs; size 4 straight knitting needles.
Cast on 41 sts. Work in k 1, p 1 ribbing for 30 rows.
Start heel: Knit 11 sts, turn, work in stockinette st (k 1 row, p 1 row) for 16 row, ending with a p row, turn.
Next row: K 2, k 2 tog, k 1, turn, sl 1, p 3, turn.
Next row: Purl.
Next row: K 3, k 2 tog, k 1, turn, sl 1, p 4, turn.
Next row: Purl.
Next row: K 4, k 2 tog, k 1, turn, sl 1, p 5, turn.
Next row: Purl.
Next row: K 5, k 2 tog, k 1 - 7 sts on needle.
Next row: Purl.
2-Needle Socks (continued) . . .
Using left needle, pick up 10 sts along side of heel (the trick to making this heel look good, is to pick up these sts along side evenly spaced & knit them very tight), knit them, then continue across 19 center (instep) sts. Work stockinette st on remaining 11 sts for 17 rows, ending with a knit row. Work this half of heel as follows:
Next row: P 2, p 2 tog, p 1, turn, sl 1, k 3, turn.
Next row: Knit.
Next row: P 3, p 2 tog, p 1, turn, sl 1, k 4, turn.
Next row: Knit.
Next row: P 4, p 2 tog, p 1, turn, sl 1, k 5, turn.
Next row: Knit.
Next row: P 5, p 2 tog, p 1 - 7 sts on needle.
Using left needle, pick up 10 sts along side of heel (the trick to making this heel look good, is to pick up these sts along side evenly spaced & purl them very tight), purl them, then continue purling across all sts.
Next row: K 15, k 2 tog, k 19, sl 1, k 1, pass sl st over (psso), k 15.
Next row: Purl.
Next row: K 14, k 2 tog, k 19, sl 1, k 1, psso, k 14.
Next row: Purl.
Next row: K 13, k 2 tog, k 19, sl 1, k 1, psso, k 13.
Next row: Purl.
Next row: K 12, k 2 tog, k 19, sl 1, k 1, psso, k 12.
Next row: Purl.
Next row: K 11, k 2 tog, k 19, sl 1, k 1, psso, k 11.
Next row: Purl.
Next row: K 10, k 2 tog, k 19, sl 1, k 1, psso, k 10.
Next row: Purl: 41 sts on needle.
2-Needle Socks (continued) . . .
Work even in stockinette st for 10 rows (or 2 inches shorter than desired foot length - from heel to toe) ending with a purl row.
Toe Shaping:
Next row: K 8, k 2 tog, k 2, sl 1, k 1, psso, k 13, k 2 tog, k 2, sl 1, k 1, psso, k 8.
Next row: Purl.
Next row: K 7, k 2 tog, k 2, sl 1, k 1, psso, k 11, k 2 tog, k 2, sl 1, k 1, psso, k 7.
Next row: Purl.
Next row: K 6, k 2 tog, k 2, sl 1, k 1, psso, k 9, k 2 tog, k 2, sl 1, k 1, psso, k 6.
Continue decreasing in same way, until 17 sts remain. Leaving sts on needle, cut yarn leaving short tail, then use a crochet hook to pull tail through rem sts & remove needle. Pull sts tightly, then pull tail through opposite beginning st and secure. I did it this way, so the toe doesn't have any bumps or uneven edge.
The trick to having a flat seam:
Using an iron, press edges flat, as knitted edges always have a tendency to curl under. Then I used a matching needle & thread to sew seam together, making sure that I just caught 1 strand of yarn from each edge, and not pulling extremely tight. This will keep your edge smooth & flat.
Using same needle & thread, sew any loose yarn ends in place, fold top of sock over, and you have a darling pair of sockies for a little one!
This pattern also works great for larger socks. You can make the ribbing longer, foot length longer, use a heavier yarn, larger needle, etc.