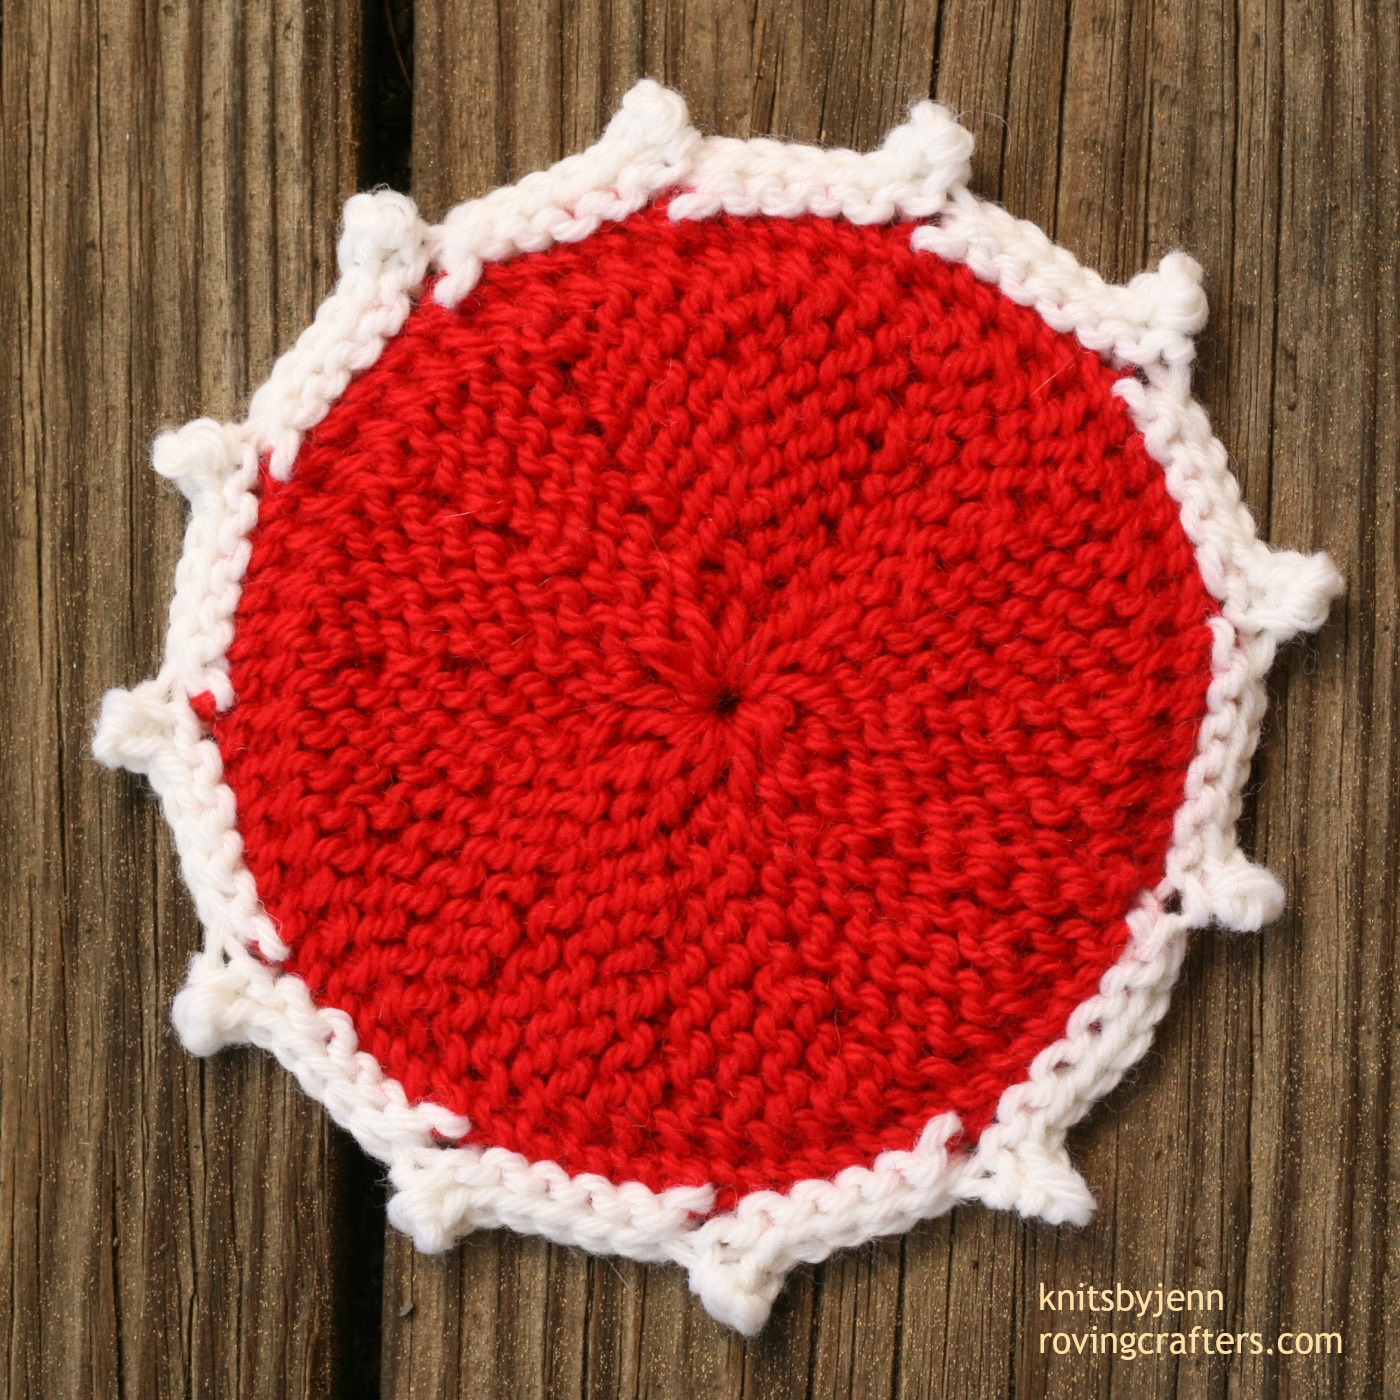
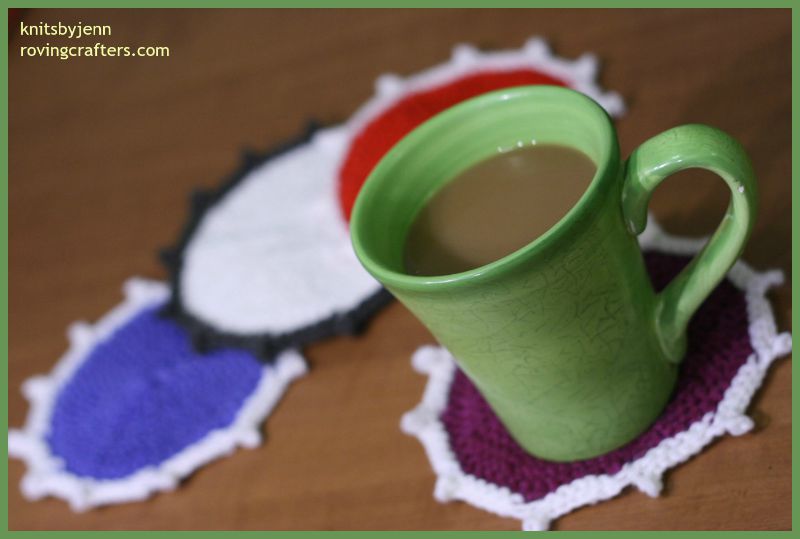
Knitted Coasters in Colors
Revamp your table setting with our exquisite collection of Knitted Color Coasters. These coasters are not just your ordinary table accessories; they are a statement piece that will instantly elevate the ambiance of any room. Crafted with meticulous attention to detail, our coasters are made from high-quality yarn that is expertly knitted to create a stunning array of colors. ach coaster is a work of art, showcasing a unique combination of vibrant hues that will catch the eye of anyone who sets foot in your home. Whether you're hosting a dinner party or enjoying a quiet evening with loved ones, these coasters will add a touch of elegance and sophistication to your tabletop. The intricate knitting patterns not only enhance the visual appeal but also provide a soft and cushioned surface to protect your furniture from unsightly water rings and heat damage.

Yarn: worsted weight, approx 15 g of the main color and 7 g of the contrast color. I used Cascade 220 for these.
Needle: US size 6 (4mm)
Size : finished (with the edging) these are 5 inches (13 cm) in diameter

Abbreviations
- k: knit
- Sl: slip stitch purl-wise
- S&T: stop before the end of a row and turn work to other side
To Make the Center
To make the center circle you will work in short rows. These are garter stitch short rows so there is no wrapping and no picking up wraps.
With Main Color, Cast On 10 sts
Row 1: Sl1, k8. S&T
Row 2: k to end
Row 3: Sl1, k6. S&T
Row 4: k to end
Row 5: Sl1, k4. S&T
Row 6: k to end
Row 7: Sl1, k2. S&T
Row 8: k to end
Row 9: Sl1: k to end of row (work all 10 stitches)
Row 10: Sl1, k to end
That completes one wedge of the circle. Repeat these rows 11 more times (12 wedges total).
Bind off leaving a long tail. Use this tail to sew the bind off edge to the cast on edge. Then, with the same tail, close the center hole. Do this by threading the tapestry needle through all 12 of the slipped stitches (those made at the beginning of Row 10’s) and pull them closed. Or not! I kind of like the look of them with center holes.
To Make the Edging
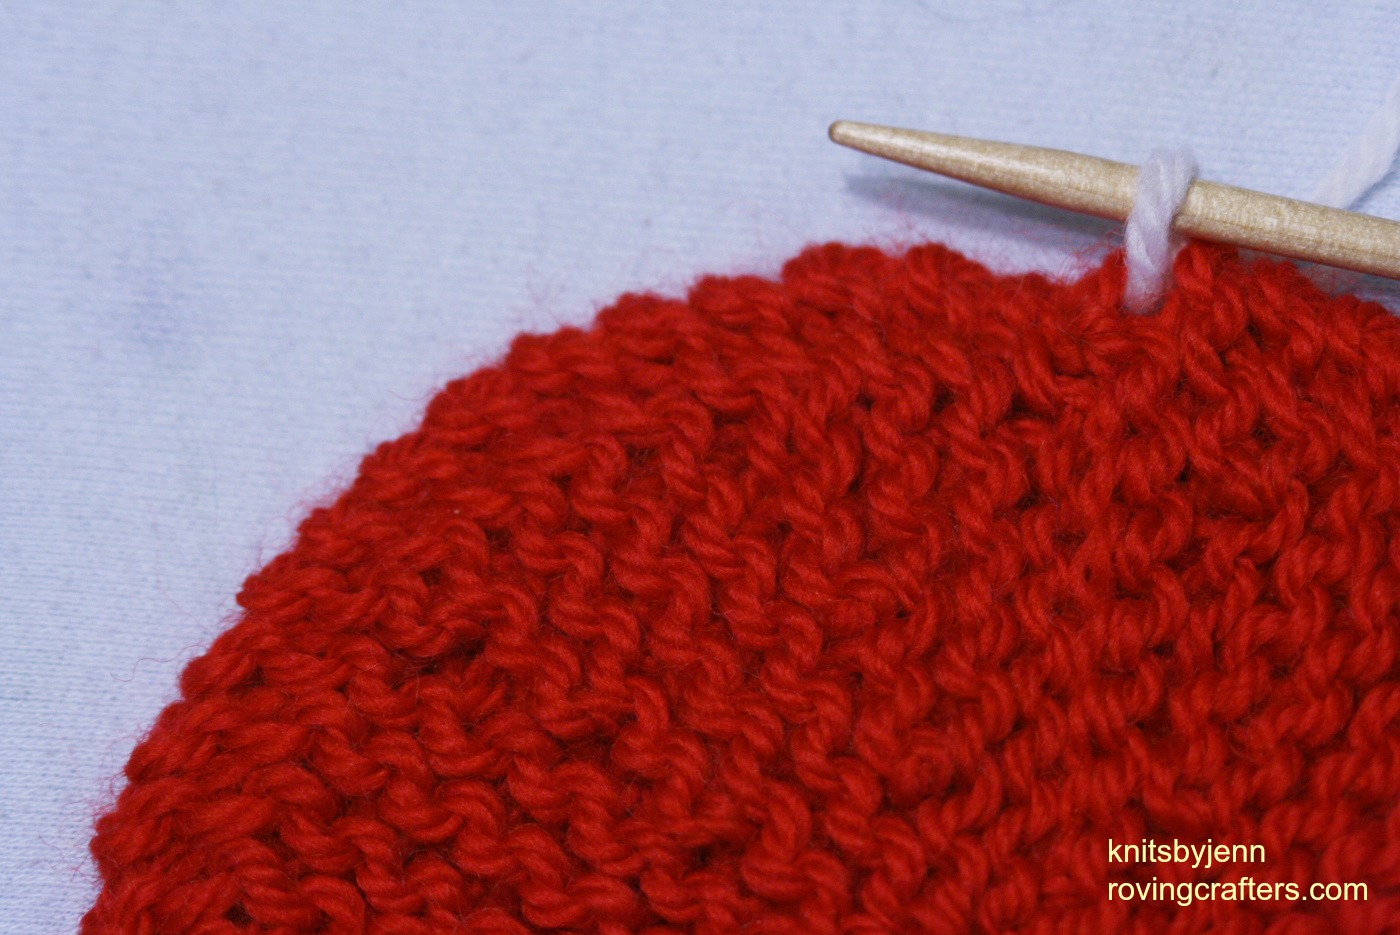
This is a knitted-on edging. I’ve made this part of the pattern a photo tutorial since it requires a few unconventional knitted “gymnastics” and that is always easier to show in pictures than with words.
I start my edging at the seam made when sewing the circle closed. The count here will work out if you pick up and knit through every slipped stitch on the edge of the circle. However, I would not worry about that too much. This is a very forgiving pattern and if you reach the end of your edging and find yourself with one or two extra/missing stitches just fudge it. That’s what I do when I’m not making things that get plastered all over the internet. I fudge it!
With Contrast Color, pick-up and knit 1 stitch.
Then begin the following steps that get repeated all around the circle.
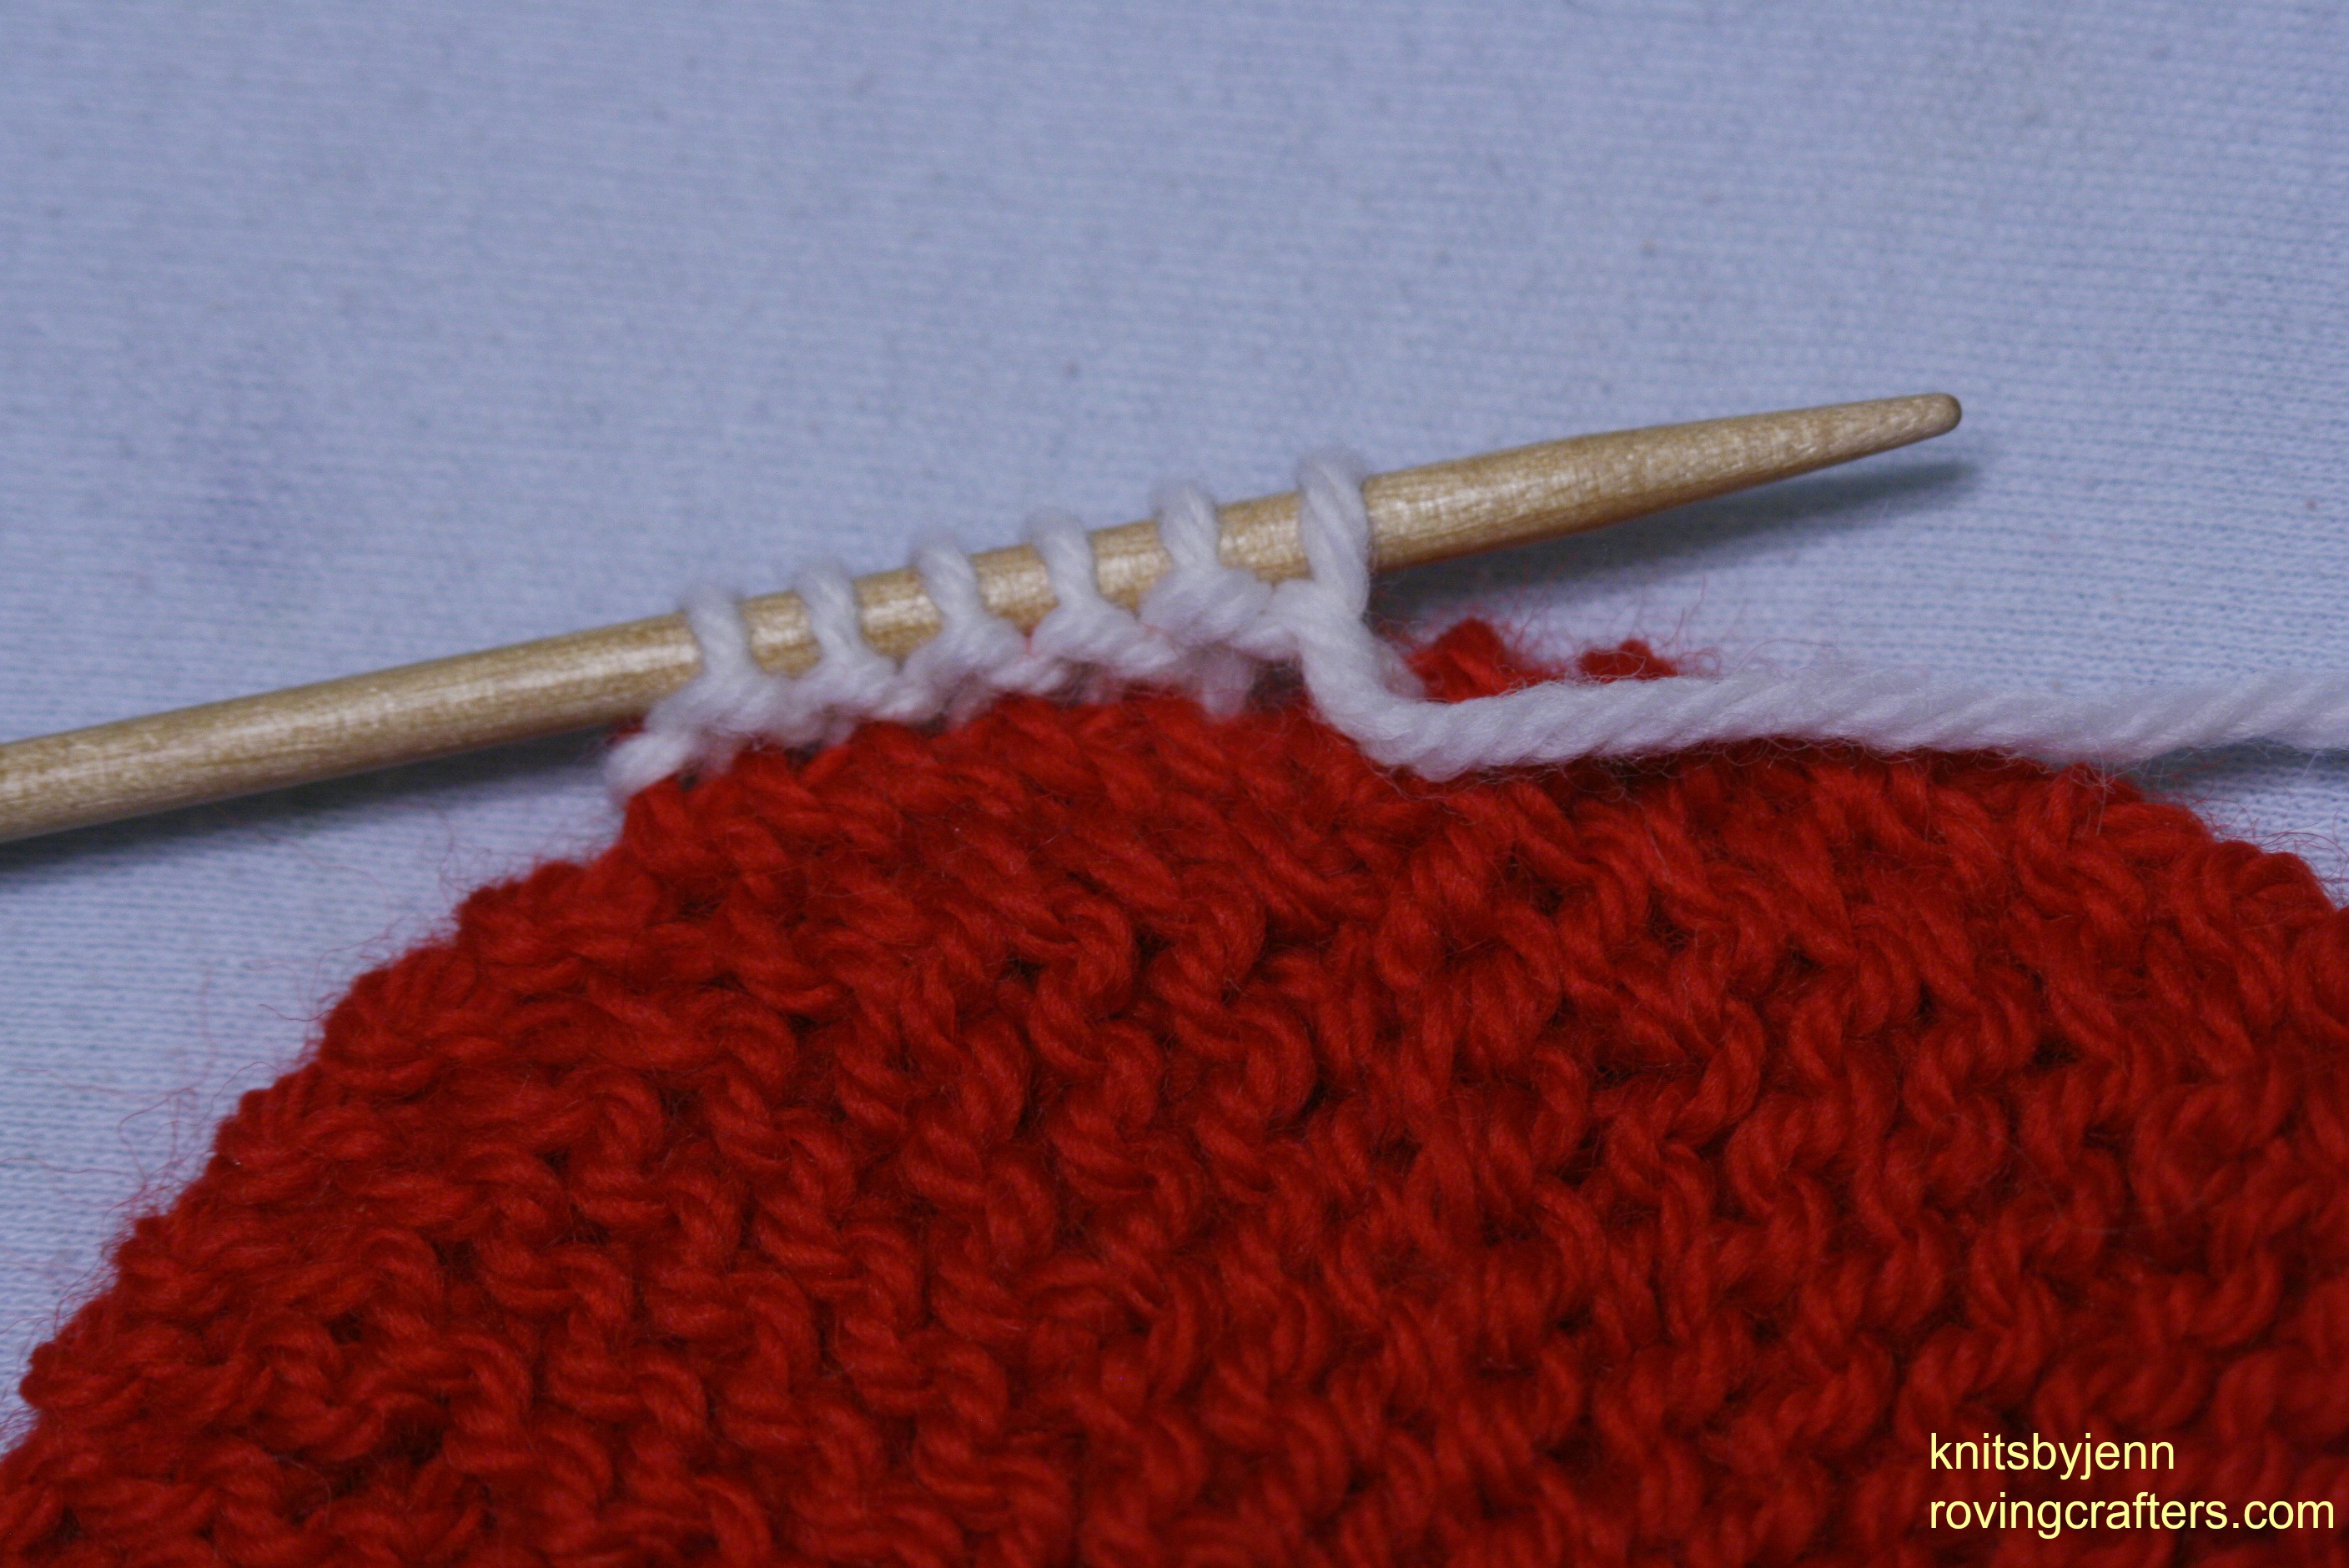
Step 1: Pick-up and knit 5 stitches. (should have 6 loops on the right-handed needle)
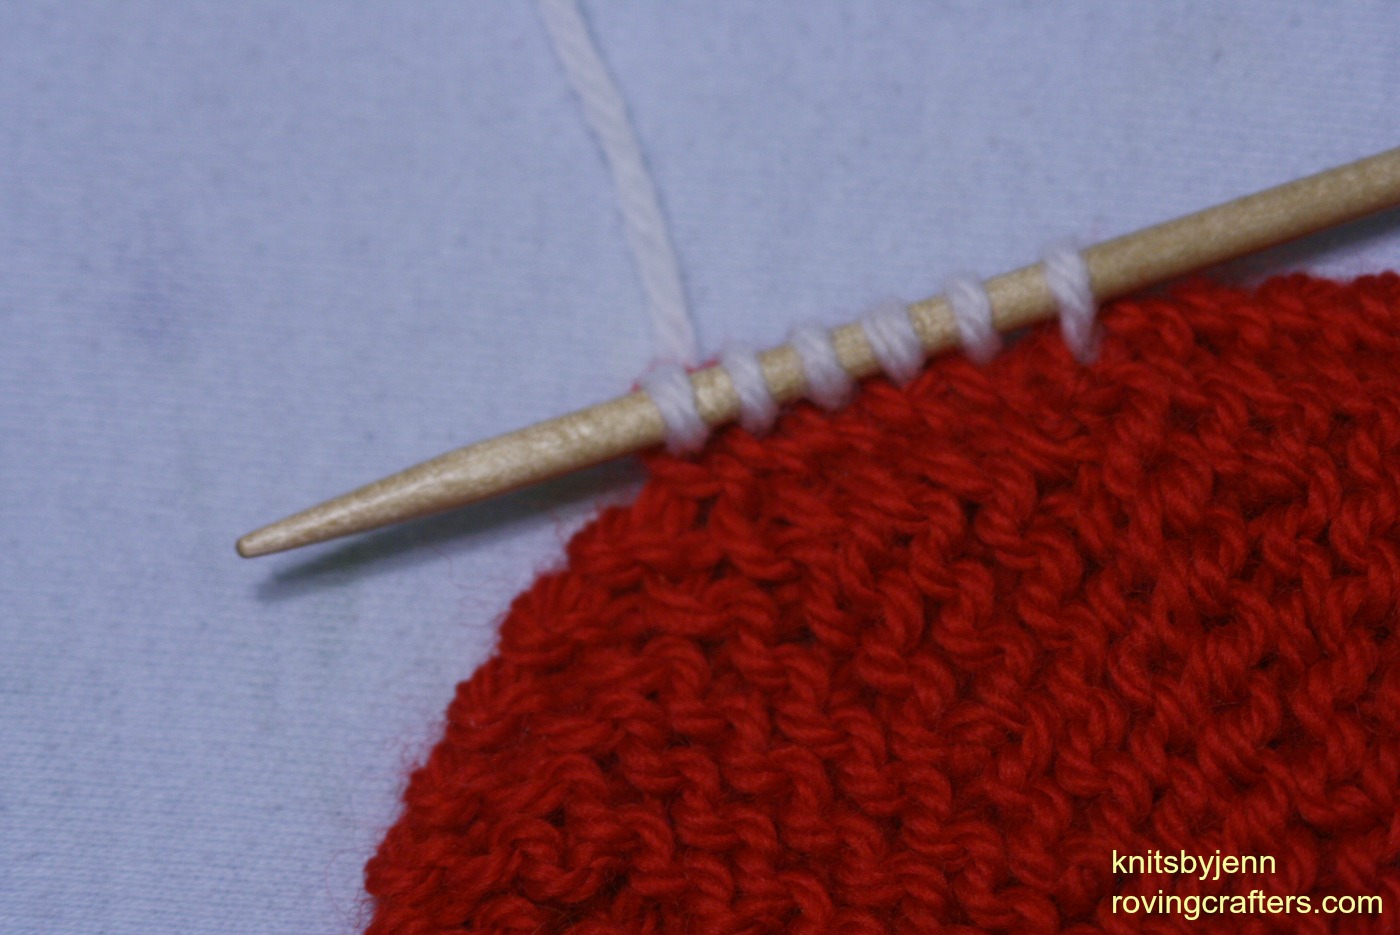
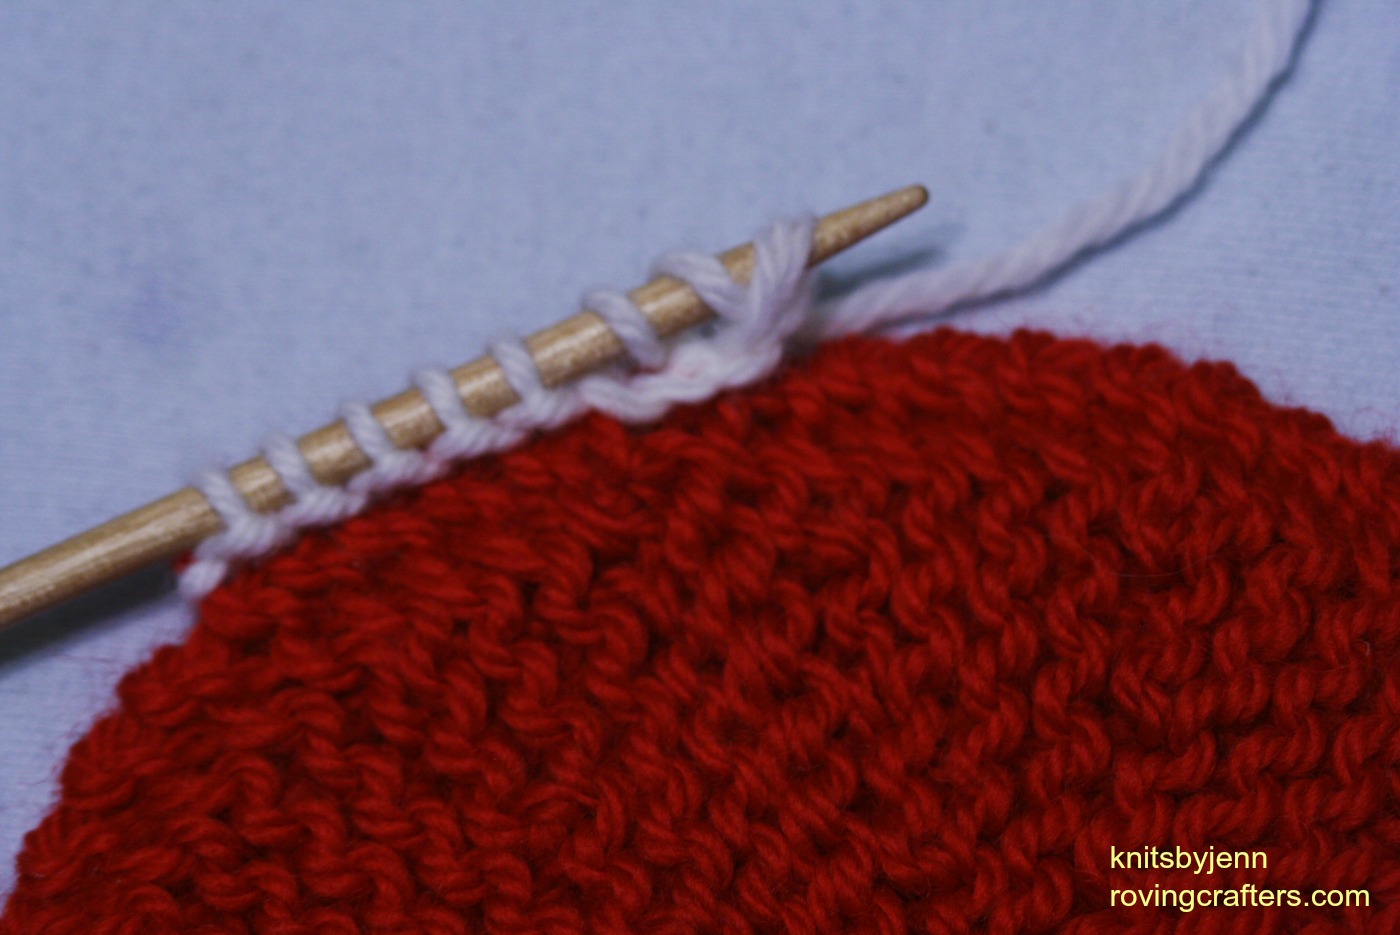
Step 2: Turn work and knit back to end
Step 3: Cast on 2 stitches. I use the knitted cast-on method but the backwards e-loop cast on would work as well.
Step 4: Bind off all stitches leaving one loop on the right-handed needle
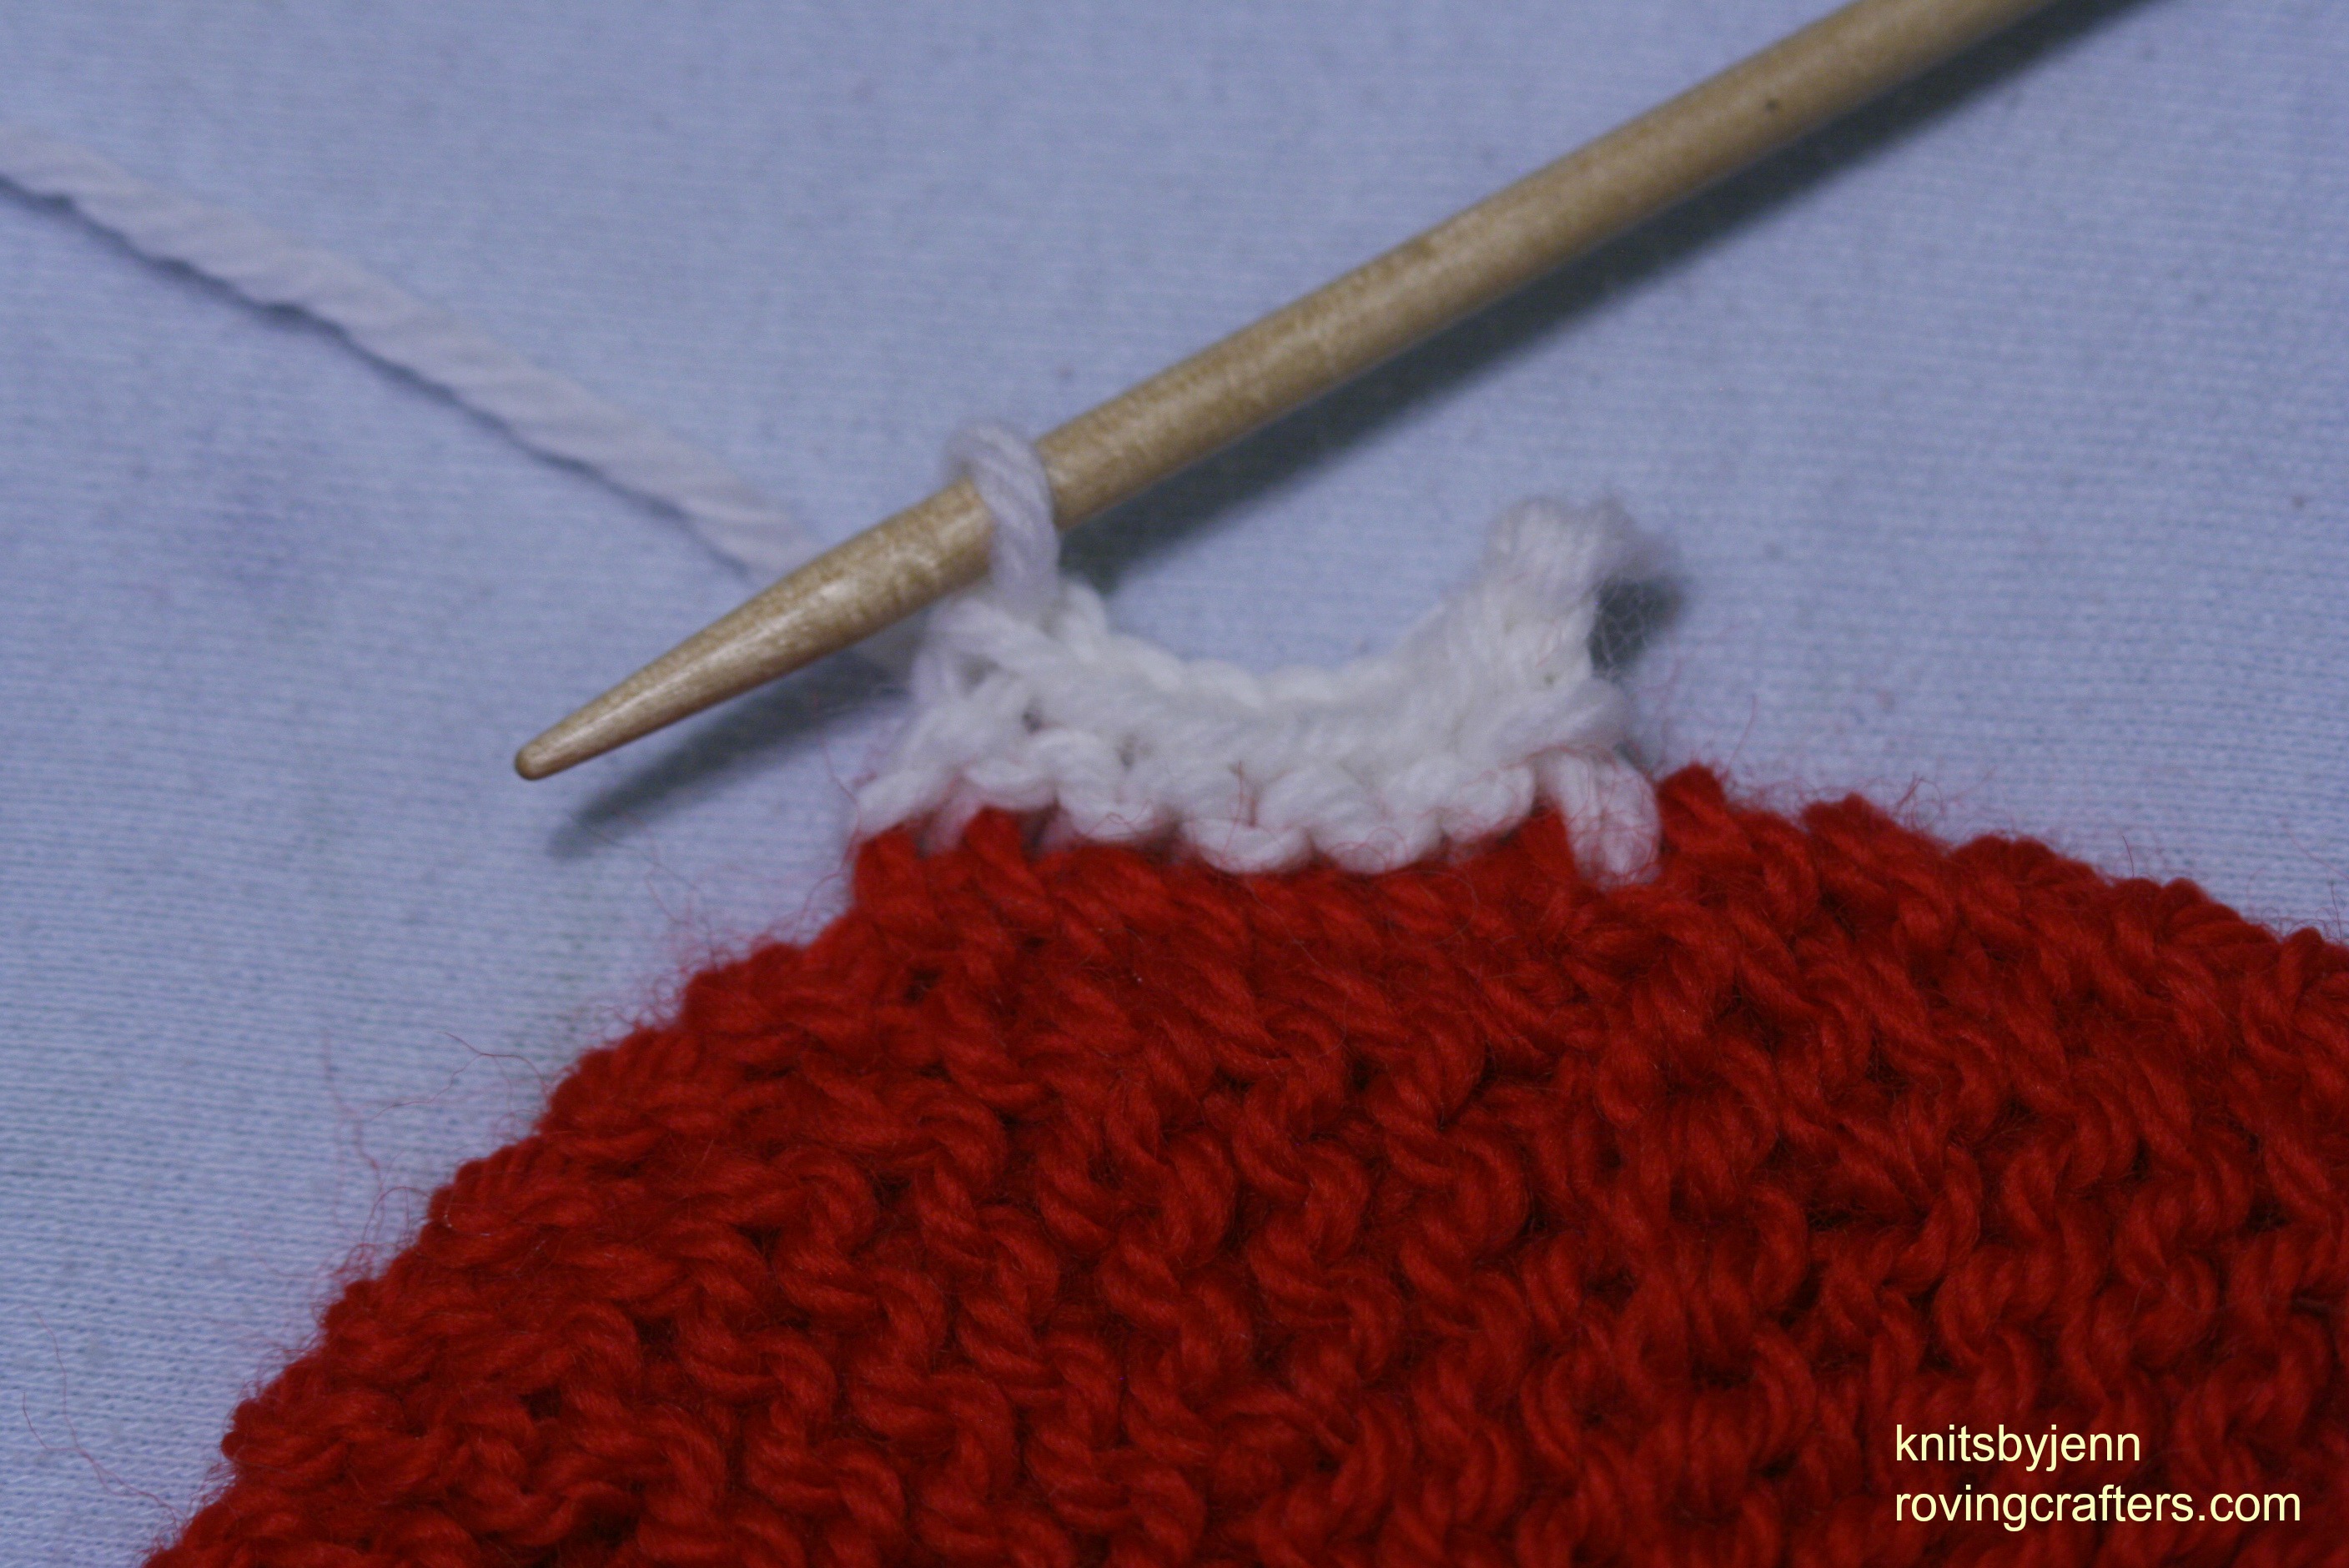
Repeat Steps 1 – 4 eleven more times (twelve times total). Then weave in the ends.