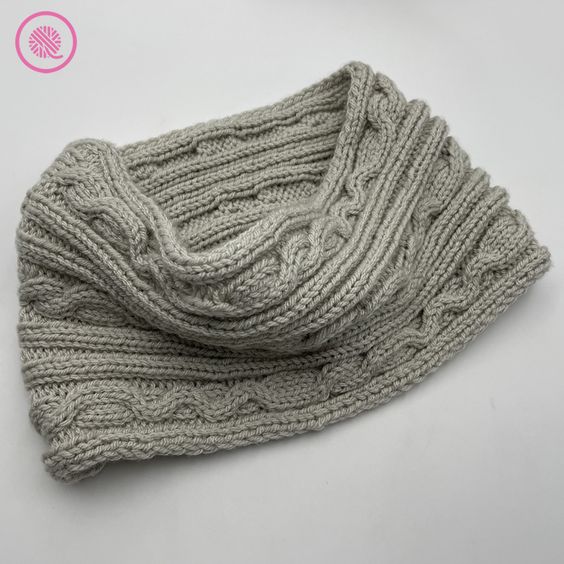
Knitted Cable Cowl
Imagine a cozy accessory that combines the warmth of a scarf with the convenience of a cowl. The Knitted Cable Cowl is a stylish and practical piece that adds a touch of sophistication to any outfit. Handcrafted with intricate cable knit patterns, this cowl is not only fashionable but also functional, providing extra insulation against the cold weather. Whether you're running errands or meeting friends for coffee, this versatile accessory is sure to keep you looking chic and feeling comfortable. Whether you're dressing up for a night out or simply bundling up for a walk in the park, the Knitted Cable Cowl is the perfect accessory to keep you warm and stylish all season long.
MATERIALS
Yarn
Bulky (#5) weight yarn
Yarn Bee Soft & Sleek Chunky (211 yds/5 oz., 193 m/142 g) in color Light Grey used in sample. 1 ball
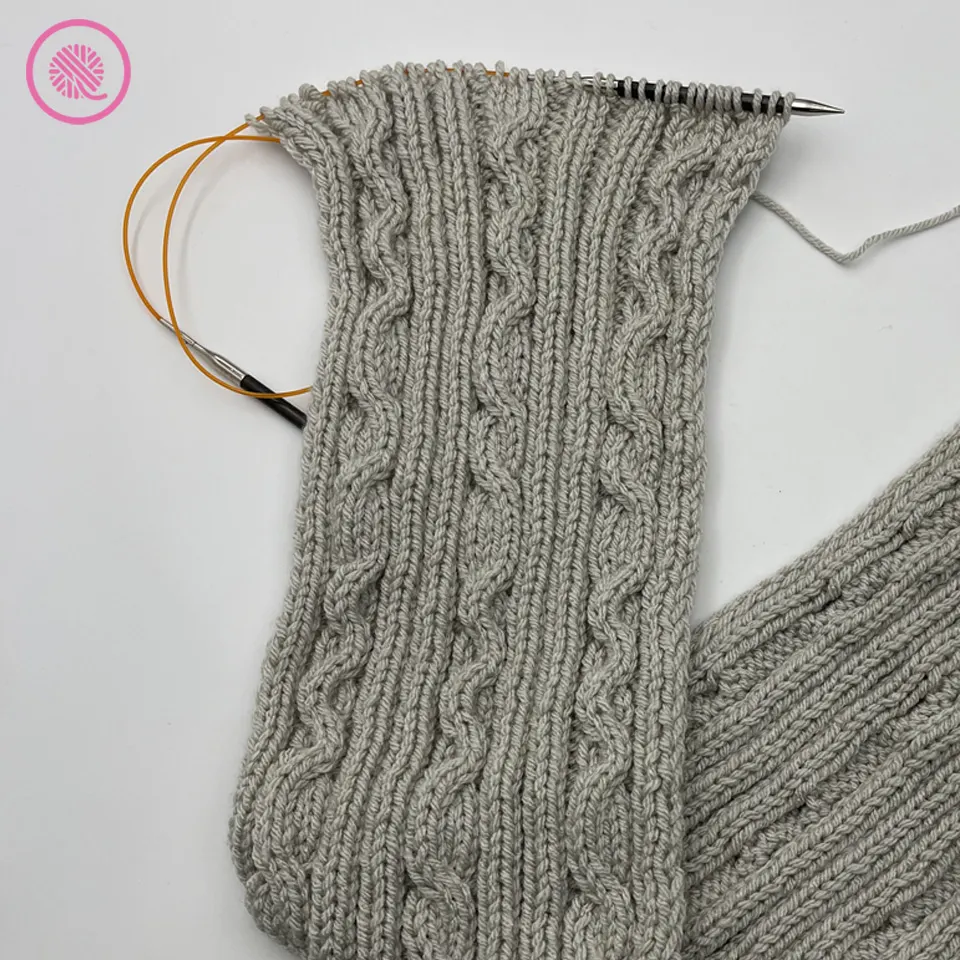
Needles
US 10 (6 mm) needles
Knitter’s Pride Karbonz DPNs used in sample.
Tapestry needle for seaming and weaving in ends
Measuring tape
GAUGE 4 sts x 5 rows = 1” (2.5 cm) in 2×2 ribbing
SKILL LEVEL Intermediate
MEASUREMENT Approx. 9.5” wide x 29” long (24.13 x 73.5 cm) after blocking
ABBREVIATIONS
2/2LC = 2 over 2 Left Cable
2/2RC = 2 over 2 Right Cable
K = Knit
Rep = Repeat
RS = Right side
Sl = Slip stitch
St(s) = Stitch(es)
WS = Wrong side
NOTES
The Squiggle Cable Cowl is knit as a flat panel then seamed. The design includes both right and left twist cables.
Cast on: I recommend the long tail cast on.
Bind off: Bind off in pattern. “In pattern” means you knit the knits and purl the purls as you work your bind off.
Slip stitch: Slip stitch purlwise, bring the working yarn to front before slipping on a purl row.
2/2LC: 2 over 2 Left Cable. Remove next 2 sts with cable needle and let hang to front of work. Knit next 2 2 stitches making sure to draw up first stitch tighter. Next work 2 sts held on cable needle in order. Knitting may be tight for next round but will ease up by next cable row.
2/2RC: 2 over 2 Right Cable. Remove next 2 sts with cable needle and let hang to back of work. Knit next 2 stitches making sure to draw up first stitch tighter. Next work 2 sts held on cable needle in order. Knitting may be tight for next row but will ease up by next cable row.
TIP: I used a letter J-shaped cable needle; take sts off with smaller end of J-hook then knit stitches in order using longer part of J-hook as you would from a needle.
Ribbing: 2 x 2 ribbing (knit 2, purl 2) is used in this pattern as the border for the cable.
INSTRUCTIONS
Cast on 42 stitches from right to left.
Set Up for Cables:
Row 1 (WS): Sl. P2, K2. *P4. K2, P2 (twice). K2. Rep from * once til last 9 sts. P4, K2, P3.
Row 2 (RS): Sl. K2, P2. *K4. P2, K2 (twice). P2. Rep from * once til last 9 sts. K4, P2, K3.
Row 3: Rep Row 1.
Cable Pattern:
Row 4 (RS): Sl. K2, P2. *2/2LC. P2, K2 (twice). P2. Rep from * once until last 9 sts. 2/2LC, P2, K3.
Row 5-8: Rep rows 1-2 twice.
Row 9: Rep row 1 once.
Rows 10: Sl. K2, P2. *2/2LC. P2, K2 (twice). P2. Rep from * once until last 9 sts. 2/2LC, P2, K3.
Rows 11-16: Rep rows 1-2 three times.
Row 17: Rep row 1 once.
[Serpentine Right]
Row 18: Sl. K2, P2. *2/2RC. P2, K2 (twice). P2. Rep from * until last 9 sts. 2/2RC, P2, K3.
Row 19-20: Rep Rows 1-2 once.
Row 21: Rep row 1 once.
Row 22: Sl. K2, P2. *2/2LC. P2, K2 (twice). P2. Rep from * once until last 9 sts. 2/2LC, P2, K3.
Rows 23-24: Rep Rows 1-2 once.
Row 25: Rep row 1 once.
Rows 26-33: Rep rows 18-25 once.
Rows 34-37: Rep rows 18-21 once.
Row 38 (RS): Rep row 2.
Row 39: Rep row 1.
Row 40: Rep row 2.
Row 41: Rep row 1.
Rows 42-79 & 80-117: Rep Cable Pattern Rows 4-41 twice. [76 rows].
Rows 118-154: Rep Cable Pattern Rows 4-38 once. [35 rows]
[Cowl should measure approximately 29” (73.5 cm).]
Finishing:
Bind off in pattern leaving long tail for seaming. Block cowl, if desired. I recommend blocking to make sure the bind off and cast on edges line up evenly for seaming.
From right side, sew cast on edge to bind off edge, without twisting the cowl, using the mattress stitch for ribbing. This technique is shown in the video linked above.
Weave in ends.