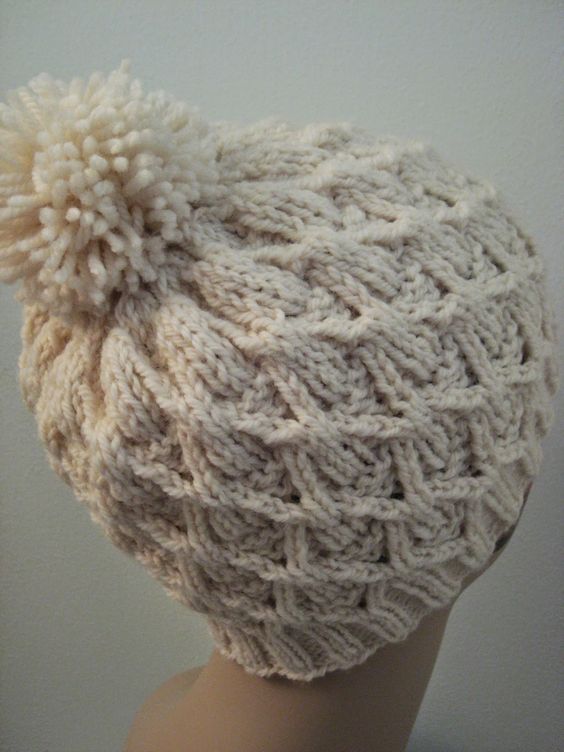
Knitted Wickerwork Hat
Imagine a cozy, handcrafted hat made from intricately woven wicker material. This unique accessory combines the warmth of knitted fabric with the rustic charm of wickerwork, creating a stylish and eye-catching piece that is perfect for both fashion and function. The careful craftsmanship that goes into creating a knitted wickerwork hat results in a one-of-a-kind accessory that is sure to turn heads and keep you warm during the colder months. The softness of the knitted fabric contrasts beautifully with the sturdy, natural look of the wickerwork, creating a harmonious blend of comfort and style. Whether you're out for a leisurely stroll in the park or heading to a winter festival, a knitted wickerwork hat is the perfect accessory to elevate your look and keep you cozy at the same time.
Yarn: Patons Classic Wool (100% Pure New Wool; 210 yards [192 meters]/100 grams); #202 (Cream) - one skein
Needles: 16" circular needle in size US 5, 16" circular needle in size US 8, one set of double pointed needles, also in size US 8
Notions: Tapestry needle, stitch marker
Gauge: 20 stitches = 4 inches on size 7 needles
So let's get started! First, using your size 5 needle, cast on 104 stitches, place marker, and join in round. Then, knit 1.5" in the following ribbing:
Ribbing Row: k1, * p2, k2; rep from *; end p2, k1
And once that's done, we'll switch to our size 8 needles and our main pattern, which is Wickerwork Pattern from page 146 of Barbara G. Walker's A Second Treasury of Knitting Patterns. For this pattern, we'll need the following notation (you can find videos for the techniques below them):
rt (right twist): knit two together, leaving stitches on left-hand needle; next, insert right-hand needle from the front between the two stitches just knitted together, and knit the first stitch again. Finally, slip both stitches from left-hand needle together
lt (left twist): with right-hand needle behind left-hand needle, skip one stitch and knit the second stitch in back loop; then insert right-hand needle into the backs of both stitches and k2tog-b (knit two together through back loops, inserting right needle from the right)
And we'll proceed like so:
Row 1: k1, * p2, k2 *; end p2, k1
Row 2: * k1, p1, rt, lt, p1, k1 *
Row 3: * k1, p1, k1, p2, k1, p1, k1 *
Row 4: * k1, rt, p2, lt, k1 *
Row 5: k2, * p4, k4 *; end p4, k2
Row 6: knit
Row 7: same as row 1
Row 8: * lt, p1, k2, p1, rt *
Row 9: * p1, k1, p1, k2, p1, k1, p1 *
Row 10: * p1, lt, k2, rt, p1 *
Row 11: p2, * k4, p4 *; end k4, p2
Row 12: knit
Knit rows 1 - 12 three times, and then it's time to begin our decreases. So let's proceed as follows:
Decrease Row 1: * k1, p1, ssk, k2tog, p1, k1*
Decrease Row 2: * k1, rt, lt, k1 *
Decrease Row 3: * k2, p2, k2 *
You'll want to switch to your dpns now, if you haven't already
Decrease Row 4: * k2tog, p2, ssk *
Decrease Row 5: slip first stitch from first dpn and slide to last dpn; then, * p2, k2tog *
Decrease Row 6: * p2tog, p1 *
Decrease Row 7: purl
Decrease Row 8: * p2tog *
Decrease Row 9: p1, * p2tog *
Clip tail and, using tapestry needle, thread through final 7 stitches. Pull tight, thread to inside of hat, and knot. Tuck in ends. If desired, make pompom and affix to hat. Put on and twirl happily.