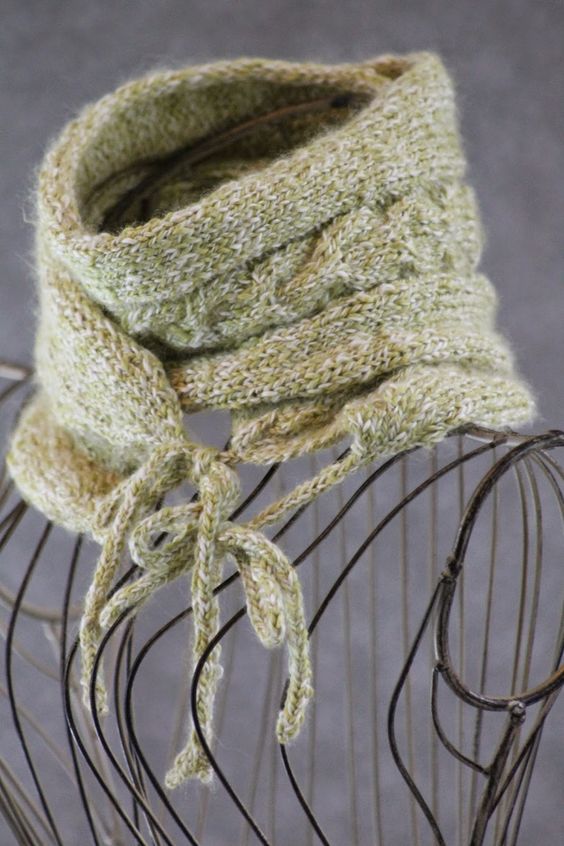
Knitted Horseshoe Cable Muffler
Step into the world of warmth and style with our exquisite Cozy Horseshoe Cable Muffler. Crafted with love and attention to detail, this knitted accessory is the perfect addition to your winter wardrobe. The intricate horseshoe cable pattern adds a touch of elegance and sophistication, making it a versatile piece that can be dressed up or down for any occasion. Wrap it around your neck and feel the luxurious softness of the high-quality yarn against your skin. Whether you're heading to a casual brunch or a formal event, this muffler effortlessly complements any ensemble. Its versatility allows you to wear it in various ways, from draping it loosely around your neck to wrapping it snugly for extra warmth. Embrace the cozy vibes and make a fashion statement with our Knitted Horseshoe Cable Muffler.
Yarn: Skacel Alpaca Seta (75% Baby Alpaca, 18% Silk, 7% Nylon; 137 yards [125 meters]/50 grams); #11 Lemon Grass Twist - 2 skeins
Needles: One set of straight needles in size US 6, two double pointed needles (dpns), also in size US 6, and a size US 8 or larger needle for your provisional cast on
Notions: Tapestry needle, cable needle (cn), stitch holder
Gauge: 22 stitches = 4 inches
So let's get started!
Using a provisional cast on and your larger needles, cast on 38 stitches. Then switch to your size 6 needles and we'll move straight to our pattern. You'll need the following terminology to continue:
cable front (cf): transfer next 2 stitches to cn and hold in front, k2, k2 from cn
cable back (cb): transfer next 2 stitches to cn and hold in back, k2, k2 from cn
Now let's get to it! As you'll notice, you'll be slipping three stitches at the beginning and end of each right side row. This will create a little i-cord edging, which will give the piece a more finished look (and, as a note, you can go ahead and pull the yarn tight behind the slipped stitches - that's what gives it that i-cord look!).
Rows 1 & 3 (right side): slip 3 stitches with yarn in back (sl3 wyib), k10, p2, k8, p2, k10, sl3 wyib
Rows 2, 4, 6, & 8: p13, k2, p8, k2, p13
Row 5: sl3 wyib, k10, p2, cb, cf, p2, k10, sl3 wyib
Row 7: sl3 wyib, k10, p2, k8, p2, k10, sl 3 wyib
Knit rows 1 - 8 until piece measures roughly 37" (or desired length - longer if you want to use it mostly as a scarf) and you've just finished row 8 of the pattern. Now, slip the first 19 stitches so that you can transfer the last 19 stitches to a stitch holder to work later. Return the original 19 stitches to your needle and work the following decrease rows (in preparation for the I-cords at the end):
Decrease Row 1 (right side): ssk, k6, slip 2 together knitwise-k1-p2sso, k6, k2tog
Decrease Row 2: purl
Decrease Row 3: ssk, k4, slip 2 together knitwise-k1-p2sso, k4, k2tog
Decrease Row 4: purl
Decrease Row 5: ssk, k2, slip 2 together knitwise-k1-p2sso, k2, k2tog
Decrease Row 6: purl
Decrease Row 7: ssk, slip 2 together knitwise-k1-p2sso, k2tog
And now that you have 3 stitches left on your needle, transfer to your dpn and work 12" in an i-cord. Bind off loosely. Transfer the remaining 19 stitches on this end of the muffler to your needles and complete in the same way, and then return to your provisional cast-on and work the 38 stitches in the same way as well (divide into 2 sets, reduce, and then make your i-cords). Tuck in ends and block.